


These are the docs for the Metabase master branch. Some features documented here may not yet be available in the current release. Check out the docs for the current stable version, Metabase v0.62.
SAML-based authentication
SAML authentication is only available on Pro and Enterprise plans (both self-hosted and on Metabase Cloud).
Integrating your SSO with Metabase allows you to:
- Provision a Metabase account when someone logs in to Metabase.
- Automatically pass user attributes from your SSO to Metabase to power row and column security.
- Let people access Metabase without re-authenticating.
Confirm the password for your Metabase admin account
Before setting up SAML, make sure you know the password for your Metabase admin account. If you encounter any issues during the setup process, you can login via the “Admin backup login” option on the sign-in screen.
Setting up SAML with your IdP in Metabase
Once you’ve confirmed the password to your Metabase admin account, head over to the Settings section of the Admin Panel, then click on the Authentication tab. Click the Set up button in the SAML section of the Authentication page, and you’ll see this form:
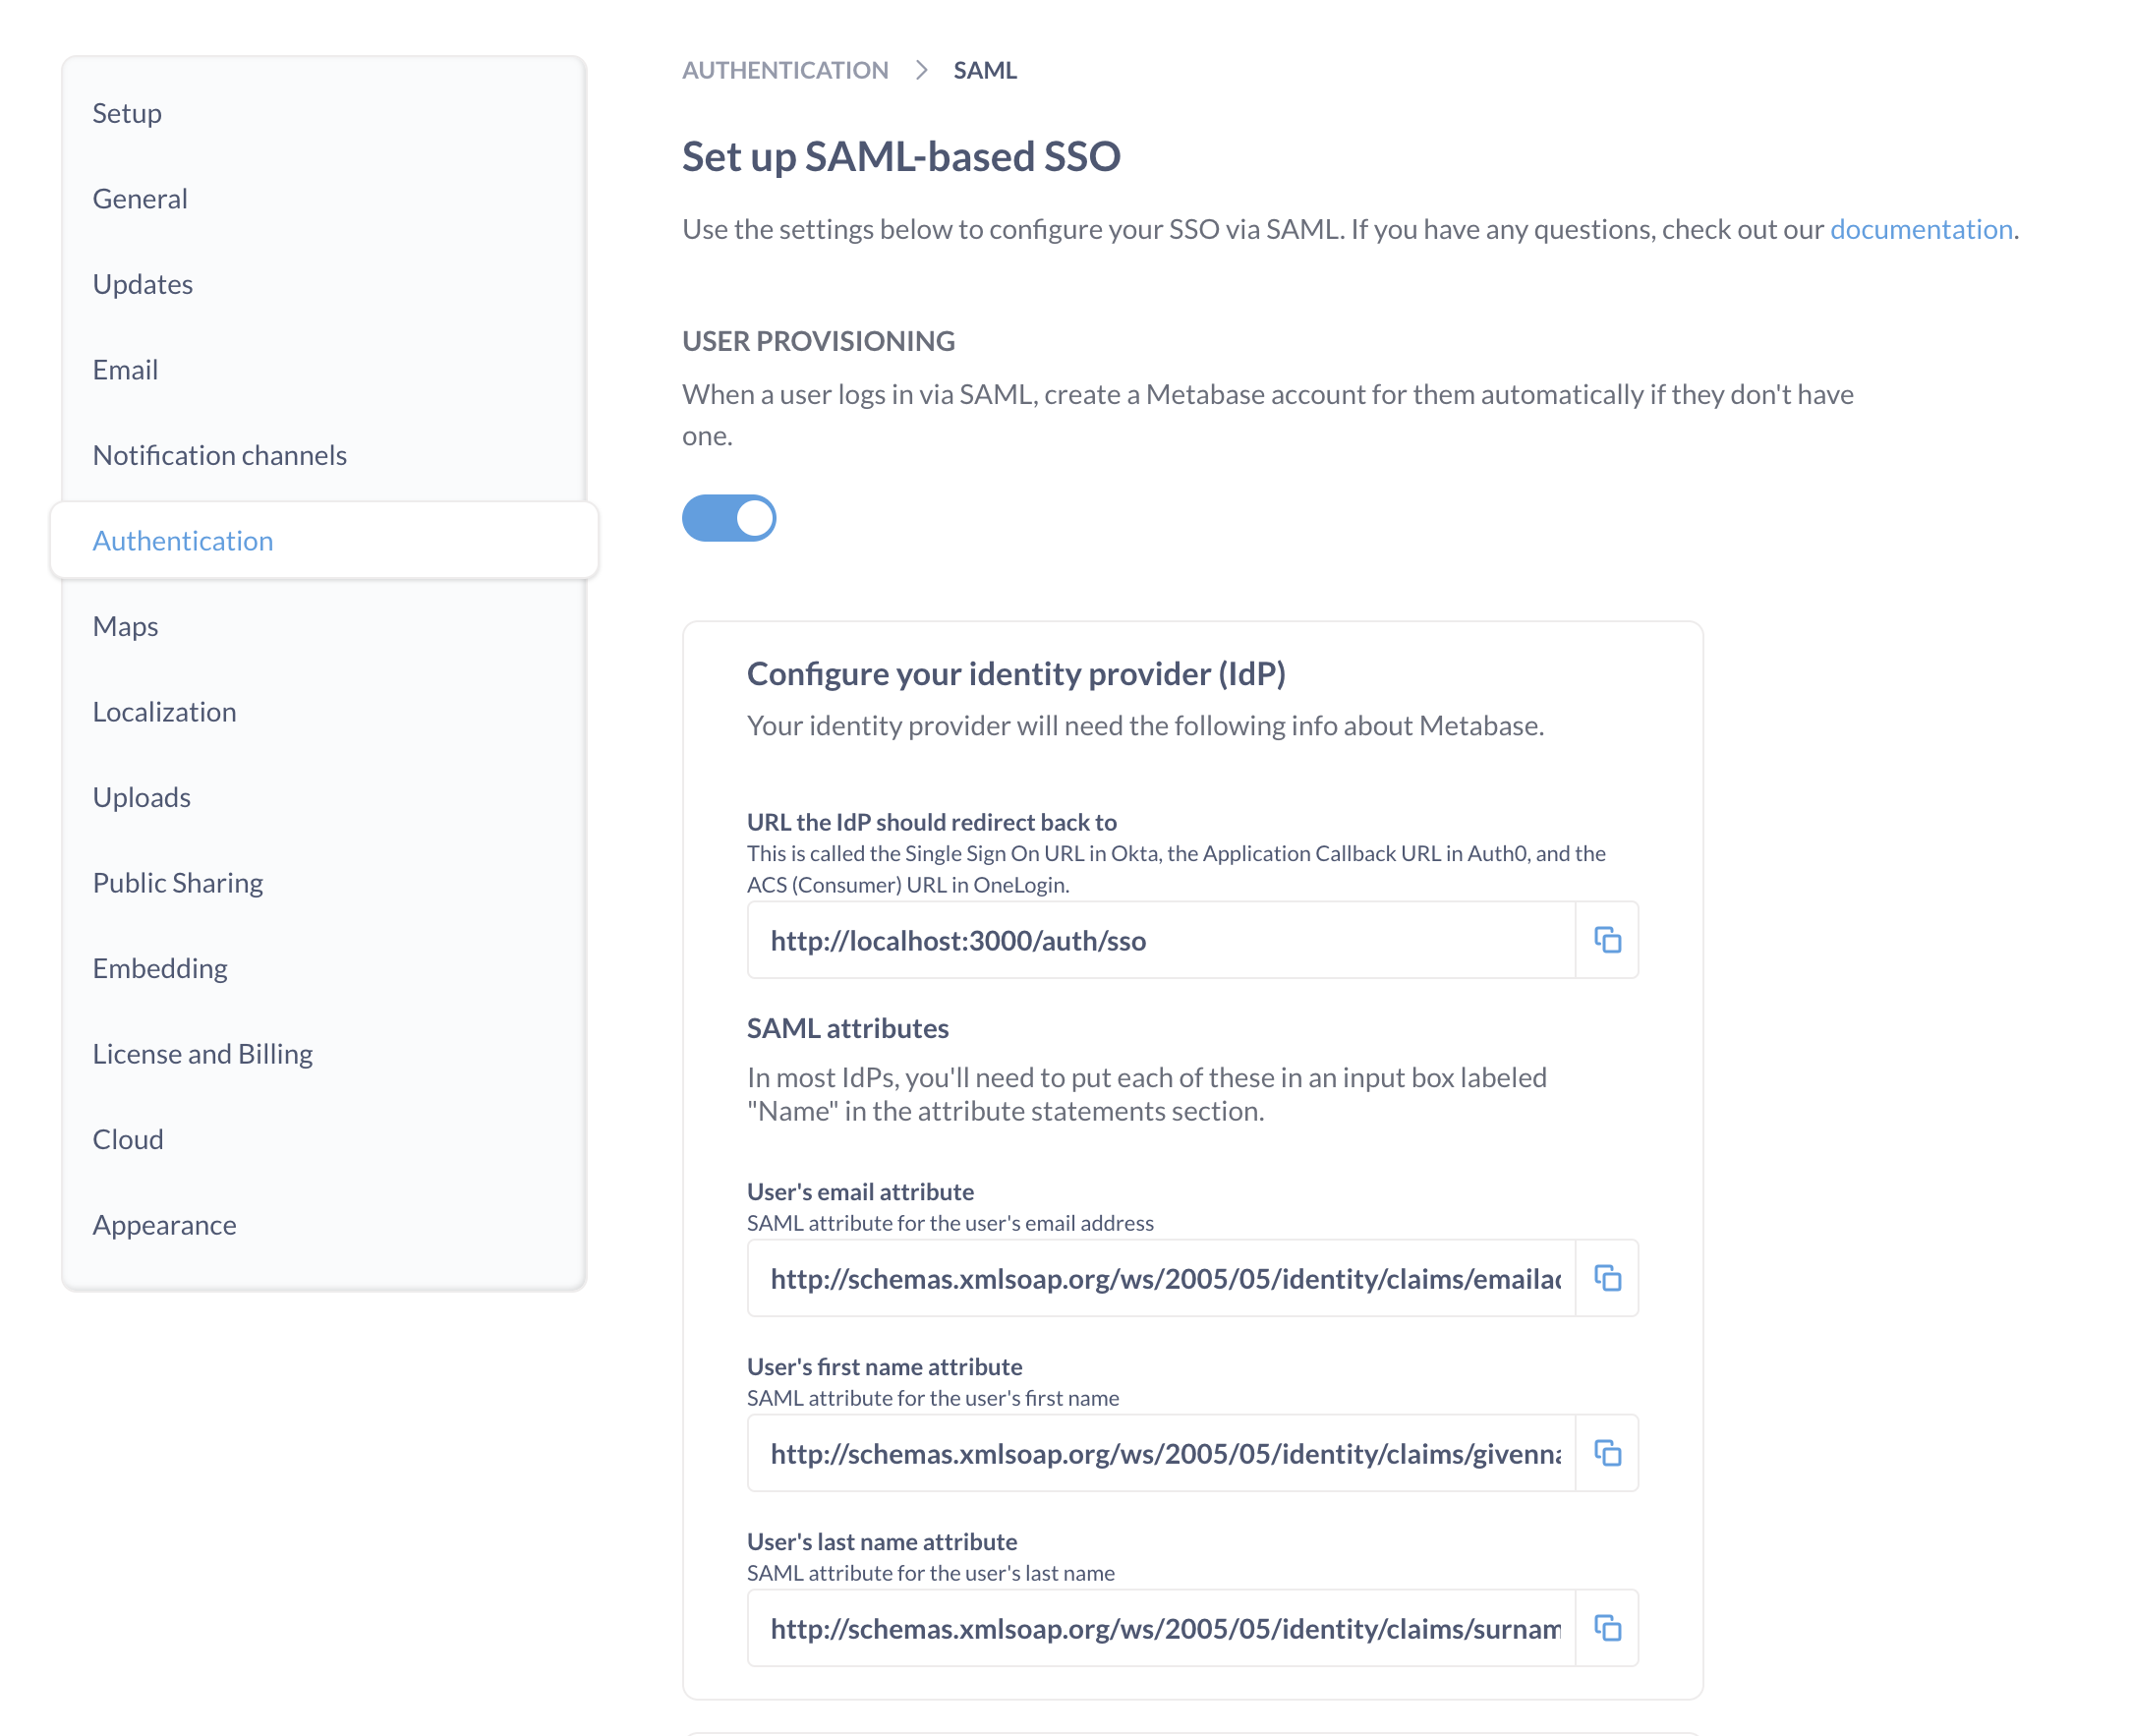
The form includes three sections:
- Metabase info that you’ll have to input into your identity provider (IdP).
- IdP info that you’ll need to tell Metabase about.
- Signing SSO requests (optional).
SAML guides
First you’ll need to make sure things are configured correctly with your IdP. Each IdP handles SAML setup differently.
We’ve written up some guides for the most common providers:
If you don’t see your IdP listed here:
- Refer to your IdP’s reference docs on configuring SAML. You’ll be looking for something like this OneLogin SAML guide.
- Using the information found on the Metabase SAML form, fill out your IdP’s SAML form.
- For more information, see the next section on Generic SAML configuration.
User provisioning
User provisioning is enabled by default. Metabase will create accounts for people who don’t yet have a Metabase account but who are able to log in via SAML SSO.
If you disable user provisioning, users without accounts or with deactivated accounts will not be able to log in.
If you’ve set up User provisioning with SCIM, you’ll want to turn this setting off so that Metabase doesn’t automatically create a new account for anyone who authenticates successfully, as you may want to use SCIM to determine who can and can’t create an account in Metabase.
Generic SAML configuration
The top portion of the SAML form in Metabase has the information you’ll need to fill out your IdP’s SAML form, with buttons to make copying the information easy.
The names of the fields in the Metabase SAML form won’t always match the names used by your IdP. We’ve provided a description of each field below to help you map information from one place to another.
URL the IdP should redirect back to
The redirect URL is the web address that people will be sent to after signing in with your IdP. To redirect people to your Metabase, your redirect URL should be your Metabase Site URL, with /auth/sso at the end.
For example, if your Metabase Site URL is https://metabase.yourcompany.com, you’ll use
https://metabase.yourcompany.com/auth/sso
as the redirect URL in your IdP’s SAML form.
Different IdPs use different names for the redirect URL. Here are some common examples:
| Provider | Name |
|---|---|
| Auth0 | Application Callback URL |
| Okta | Single Sign On URL |
| OneLogin | ACS (Consumer) URL |
User attributes
Metabase will automatically log in people who’ve been authenticated by your SAML identity provider. To do so, the first assertion returned in the identity provider’s SAML response must contain attributes for each person’s first name, last name, and email.
Most IdPs already include these assertions by default, but some (such as Okta) must be configured to include them.
Generally you’ll need to paste these user attributes (first name, last name, and email) into fields labelled “Name”, “Attributes” or “Parameters”.
If you allow people to edit their email addresses: make sure to update the corresponding account emails in Metabase. Keeping email addresses in sync will protect people from losing access to their accounts.
Settings for signing SSO requests (optional)
These are additional settings you can fill in to sign SSO requests to ensure they don’t get tampered with.
Enabling SAML authentication in Metabase
Metabase will now need to know some things about your IdP. Here’s a breakdown of each of the settings:
SAML identity provider URL
Metabase will redirect login requests to the Identity Provider URL, where people will go to log in with SSO.
Different IdPs use different names for the Identity Provider URL. Here are some common examples:
| Provider | Name |
|---|---|
| Auth0 | Identity Provider Login URL |
| Okta | Identity Provider Single-Sign On URL |
| OneLogin | SAML 2.0 Endpoint (HTTP) |
SAML identity provider issuer
The SAML identity provider issuer is a unique identifier for the IdP. You might also see “Issuer” referred to as “Entity ID”. Assertions from the IdP will contain this information, and Metabase will verify that the issuer matches the value you set.
We recommend that you set this value to make your SAML configuration more secure.
| Provider | Name |
|---|---|
| Auth0 | Identity Provider Login URL |
| Okta | Identity Provider Issuer |
| OneLogin | Issuer URL |
SAML identity provider certificate
The SAML identity provider certificate is an encoded certificate that Metabase will use when connecting to the IdP URI. The certificate will look like a big blob of text that you’ll want to copy and paste carefully — the spacing is important!
Your IdP might have you download this certificate as a file (usually .cer or .pem), which you’ll then need to open up in a text editor to copy the contents to then paste into the box in Metabase.
Note that your certificate text may include header and footer comments that look like -----BEGIN CERTIFICATE----- and -----END CERTIFICATE-----. These comments should be included when pasting your certificate text into Metabase.
| Provider | Name |
|---|---|
| Auth0 | Signing Certificate |
| Okta | X.509 Certificate |
| OneLogin | X.509 Certificate |
Settings for signing SSO requests (optional)
To sign requests so that they can’t be tampered with, you’ll need to provide additional settings.
If your IdP encrypts SAML responses, you’ll need to ensure this section is filled out.
If you change any of these settings, either during initial setup or after editing an existing value, you will need to restart Metabase due to the way the keystore file is read.
- SAML keystore path: the absolute path to the keystore file to use for signing SAML requests.
- SAML keystore password: the magic spell that will open the keystore.
- SAML keystore alias: the alias for the key that Metabase should use for signing SAML requests.
SAML Single logout (SLO)
Metabase supports single logout (SLO) for SAML.
The endpoint for SLO: /auth/sso/handle_slo
So if your Metabase is served at metabase.example.com the logout service POST binding URL would be:
https://metabase.example.com/auth/sso/handle_slo
Enable SAML SLO
SLO isn’t configurable from the Metabase interface. To enable it, you’ll need to set the following options using environment variables or your Metabase configuration file:
MB_SAML_SLO_ENABLEDtotrue;MB_SAML_IDENTITY_PROVIDER_URIto your IdP’s SLO endpoint;MB_SESSION_COOKIE_SAMESITEtonone.
For the MB_SESSION_COOKIE_SAMESITE setting to work with none, Metabase must be served over HTTPS. Browsers like Chrome will block cookies in cross-site requests if SSL is not enabled. Without HTTPS, logout requests from your IdP (such as Okta) won’t include the session cookie, which means Metabase won’t be able to end the session properly.
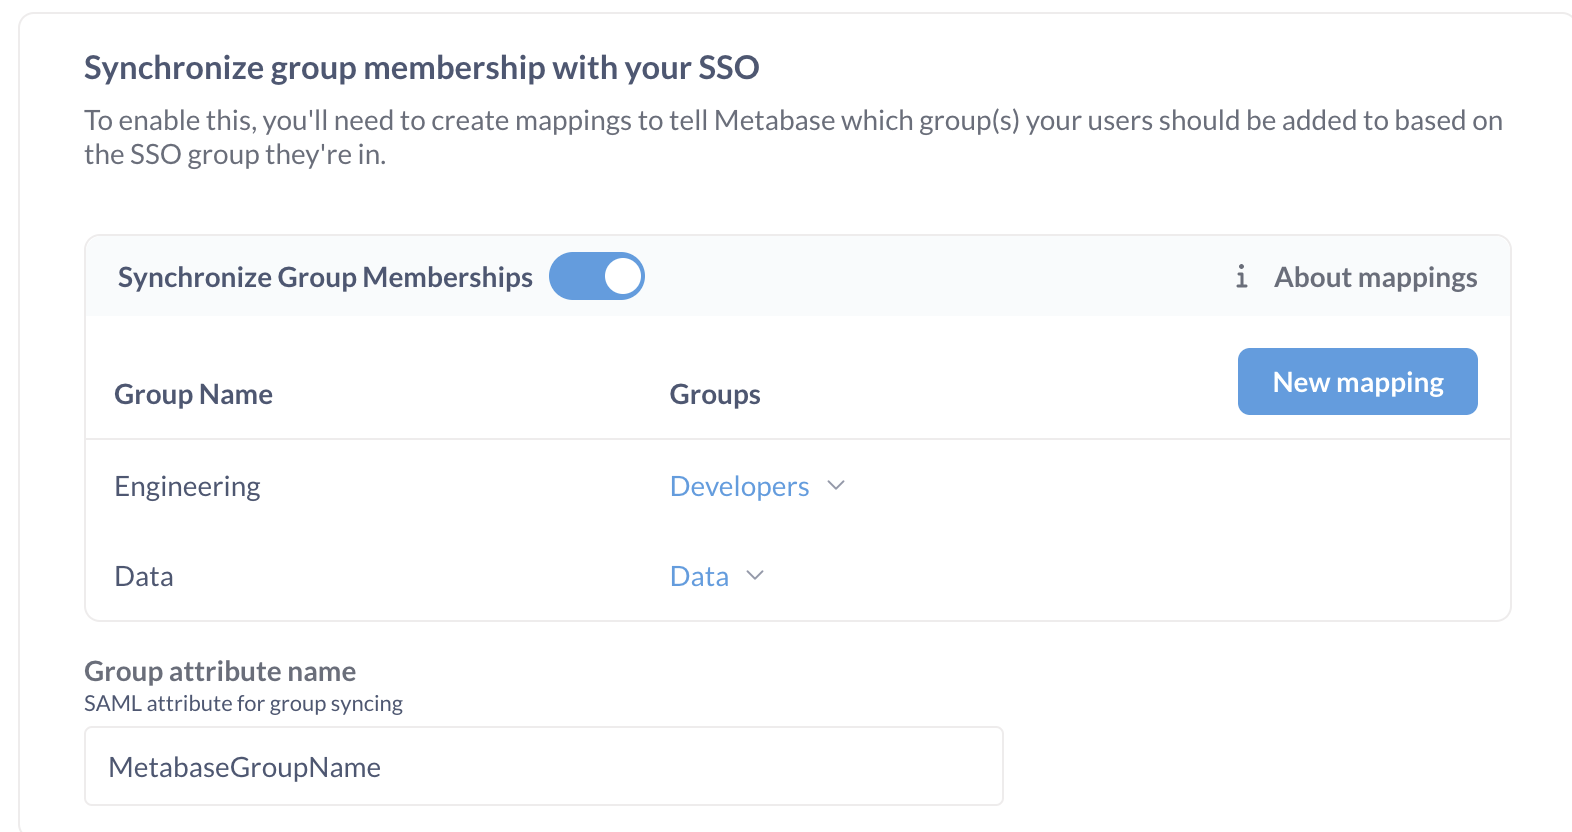
Synchronizing group membership with your IdP
This setting allows you to assign users to Metabase groups based on an attribute of your users in your IdP. This setting may not correlate to group functionality provided by your IdP; you may need to create a separate user attribute to set people’s Metabase groups, like metabaseGroups.
First, you will need to create a SAML user attribute that you will use to indicate which Metabase groups the person should be a part of. This created user attribute can be a XML string or a list of XML strings. Different IdPs have different ways of handling this, but you will likely need to edit your user profiles or find a way to map a user’s groups to a list of Metabase group names.
Configuring the group schema in Metabase
Once you’ve gotten everything set up in your SAML provider, you’ll need to configure the group schema in Metabase.
- Turn on the Synchronize group memberships setting.
- Click Edit mappings.
- Click Create a mapping.
- Enter in the name of one of the groups you entered as your
metabaseGroupsattribute values, then click the Add button. - Click the dropdown that appears under the
Groupsheading to select the Metabase group(s) that users with this particularmetabaseGroupsvalue should be added to. - Click Save.
- After that, type in the name of the user attribute you added in your SAML provider. In this case, we told Okta that the
metabaseGroupsattribute should be namedMetabaseGroupName, so that’s what we’ll enter in the Group Attribute Name field in Metabase.
Creating Metabase accounts with SSO
Paid plans charge for each additional account.
A new SSO login will automatically create a new Metabase account.
Metabase accounts created with an external identity provider login don’t have passwords. People who sign up for Metabase using an IdP must continue to use the IdP to log into Metabase.
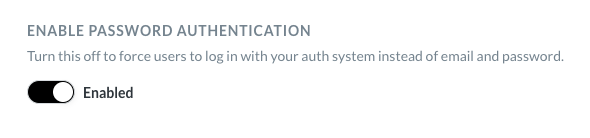
Disabling password logins
Avoid locking yourself out of your Metabase! Turning off password logins applies to all Metabase accounts, including your Metabase admin account. Before turning off password logins, make sure you can log in to your admin account using SSO.
To require people to log in with SSO, disable password authentication from Admin settings > Authentication. Turn off the Enable Password Authentication toggle.
New account notification emails
When people log in to Metabase for the first time via SSO, Metabase will automatically create an account for them, which will trigger an email notification to Metabase administrators. If you don’t want these notifications to be sent, go to Admin settings > Authentication > User provisioning, and toggle off “Notify admins of new users provisioned from SSO”
Example code using SAML
You can find example code that uses SAML authentication in the SSO examples repository.
Troubleshooting SAML issues
Read docs for other versions of Metabase.