

Multi-tenant self-service analytics
Embed the entire Metabase app (including the query builder) to give people secure, personalized access to data.

So, you’re considering embedding Metabase in your application to deliver analytics to your customers. How would that work?
In this article, we’ll start with the target experience for your customers that you’ll deliver, then talk through the relevant features Metabase offers, and how they work together to provide self-service analytics.
The target customer experience
Let’s start with what the finished analytics experience will look like from the perspective of your customers.
The players:
- Your company: Megafauna Analytics
- Customer 1: MammothCo
- Customer 2: RhinoCo
Here’s what we’re building:
You’re a B2B company, Megafauna Analytics, and you’re using Metabase to provide reporting to your customers by embedding Metabase in your app.
Here’s an overview of the customer experience: Woolly from MammothCo logs into your app at megafauna-analytics.com, then navigates to the analytics page you’ve set up for MammothCo. There, Woolly is treated to a set of screens featuring polished dashboards and charts showing MammothCo orders, transactions, and other sandboxed data you’ve provided, all of which feature your—Megafauna’s—brand colors.
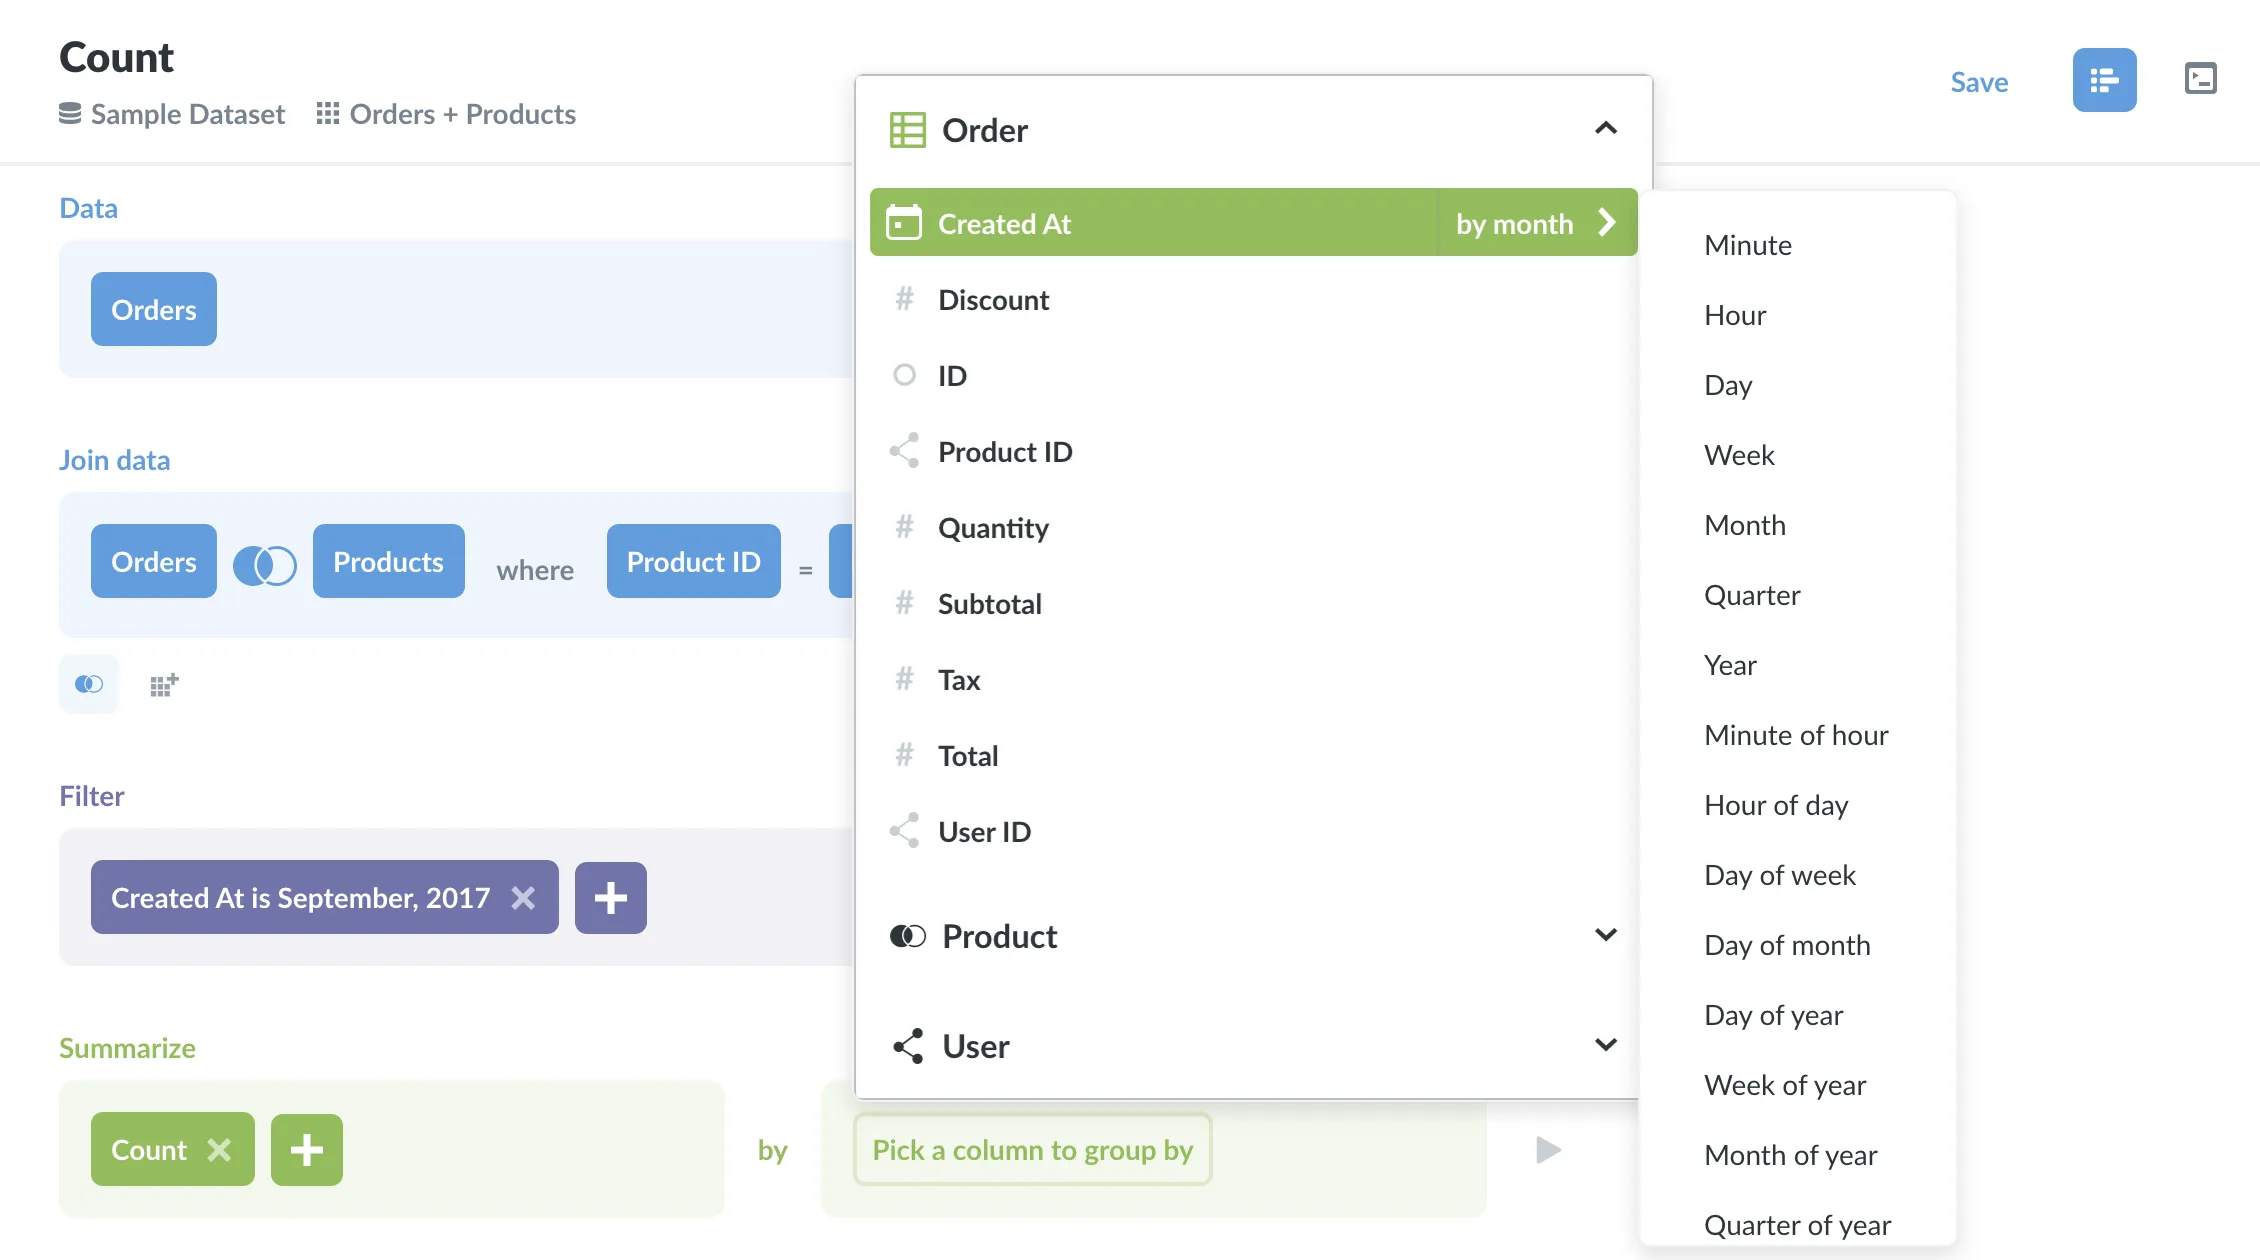
More than just viewing static dashboards, Woolly can click on data plotted on the charts and drill-through. For example, he could zoom in on a particular week of transactions, or click on a bar in a chart to pull up a table listing the unaggregated rows that populate that bar.
Woolly can also ask his own questions with the query builder.
The setup
To give Woolly the experience outlined above, we need to set up the following:
- Embedding Metabase in your app: add drill-through to embedded charts and dashboards, curate collections, expose a query builder pre-filled with a dataset, or even expose the entire Metabase interface.
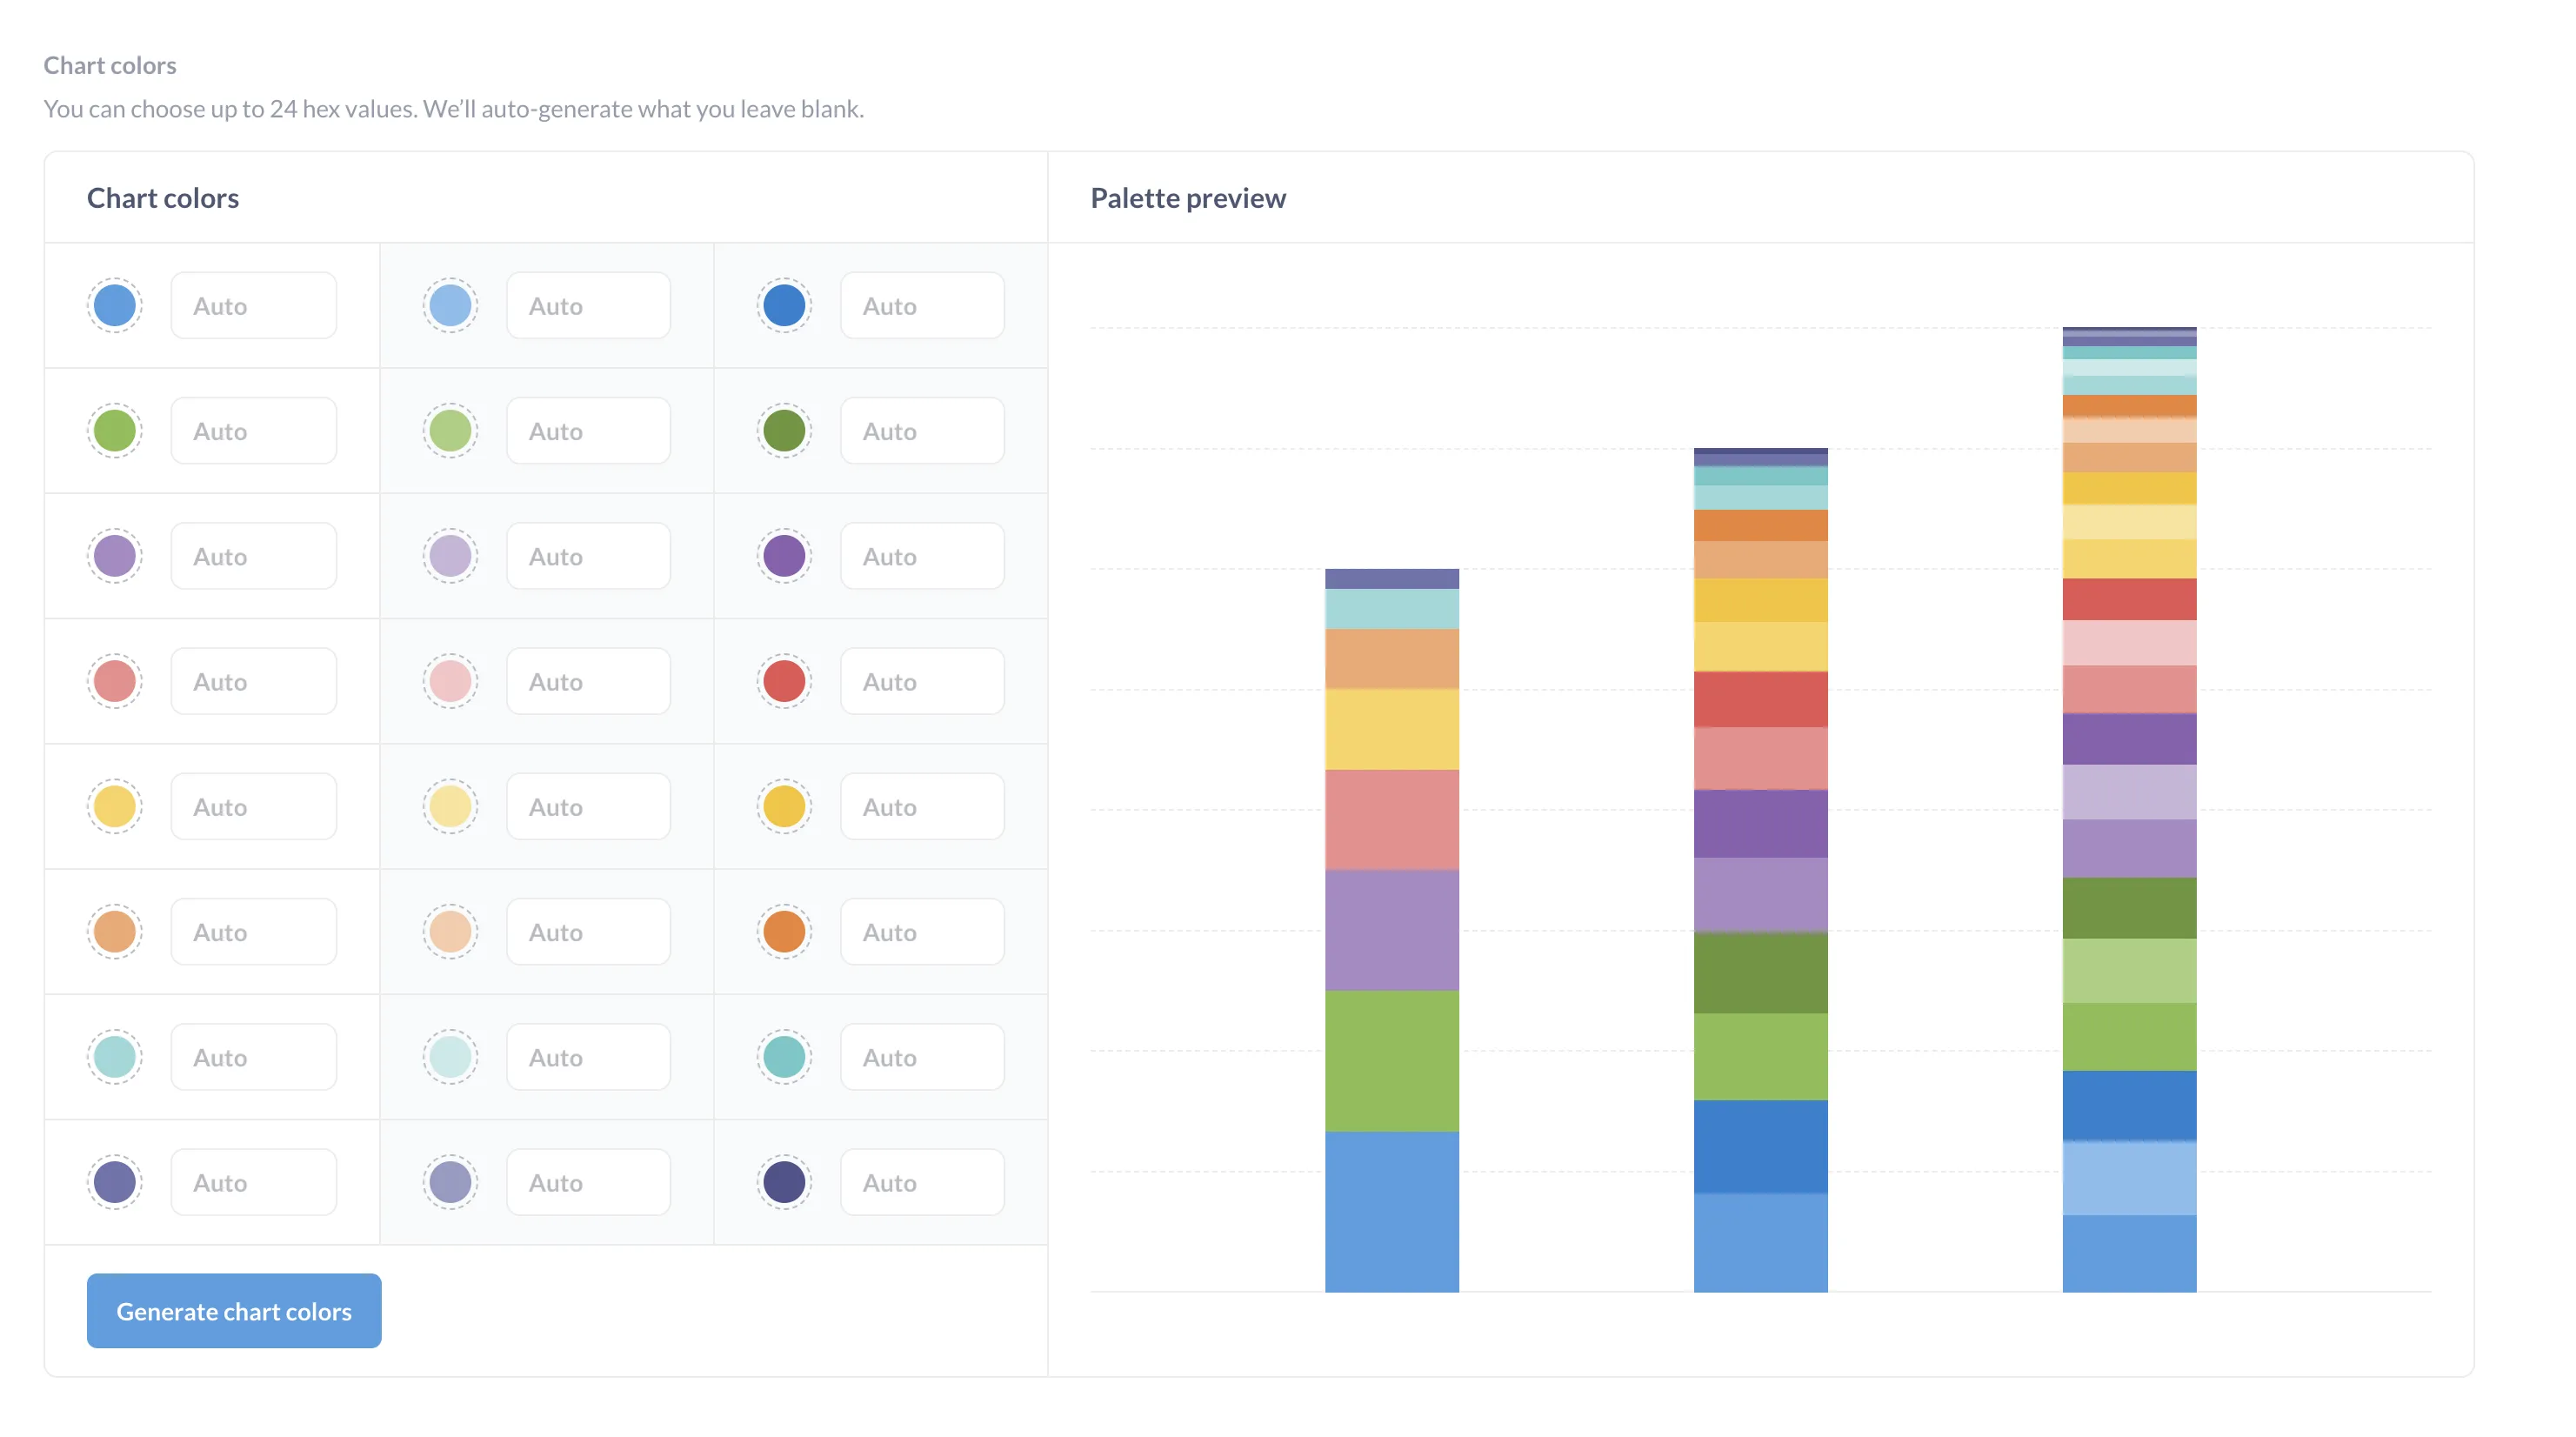
- White labeling (branding): make the Metabase charts and dashboards match the look and feel of your app, ensuring they match your (Megafauna’s) brand colors.
- Single sign-on (SSO): enable your app and Metabase to agree on who their users are and what data they can see, tying a given person in megafauna-analytics.com to an account in your embedded Metabase.
- Permissions management: let people explore their data, without seeing anyone else’s data.
We’ll go through each feature in detail in the sections below.
Putting Metabase in your app
There are several ways to handle embedding Metabase in your app. For full self-service, you’ll want to go with Interactive embedding or the Embedded analytics SDK. But here’s an overview of the options.
Public link
The dead simple option (and it may not even technically qualify as embedding). You put up a question or dashboard in your Metabase, send someone a link to it, and tell them not to share it.
Public embed
A public embed is one step up, as the link is still public, but the chart is visible in your app via an embedded iframe.
Static embed
Static embeds looks the same as public embeds, but static embeds are an iframe secured by a signed JSON Web Token (JWT). With static embeds, you can create filters on dashboards that accept parameters and filter data based on those parameters. For instance, you could have a parameterized dashboard that accepts a user ID, so when that user logs in, the dashboard would only show data restricted to their user ID. In other words, you can create a generic dashboard for user data that any user can access, but each individual will only see data relevant to them.
The big drawback with static embedding is that people can’t drill through the data or use the query builder, because Metabase doesn’t know what data permissions the person has. To link accounts across your application and your Metabase, we’ll need interactive embedding and single sign-on.
Interactive embedding
Interactive embedding, in combination with SSO and data sandboxing, is what makes the self-service reporting possible. Like the simpler embedding options above, you’re still using an iframe to embed Metabase, only this time you can embed any Metabase screen you want, complete with full interactivity. Combined with SSO and data sandboxing, your embedded Metabase will know who Woolly is and what data he can view, which means Metabase can let Woolly drill-through his data without being able to see any data from RhinoCo users or other tenants.
And because you have the full Metabase app at your disposal, you can provide MammothCo users with collections, dashboards, and predefined questions, such as week over week transactions. You can also expose Metabase’s query builder, which would allow customers like Woolly to create his own questions and dashboards (and annotate them with Markdown) based on their evolving needs for data.
See our documentation on interactive embedding.
Embedded analytics SDK
It’s like interactive embedding, but you can embed individual components of your app. The SDK gives you the most control over styling and interactions. You can use either SSO with JWT or SAML. The catch is: it’s more work than interactive embedding, and your app has to use React.
Check out our SDK docs.
White labeling (branding)
You can customize Metabase’s appearance to match your application’s look and feel. Change the font, colors, logos, and more to make it feel like a natural part of your app.
Single sign-on
Single sign-on (SSO) lets you associate users in your app with users in Metabase. By using SSO, you avoid the awkward login screens where your charts should be. Without SSO, a user would log into your app, but would still have to log into your Metabase to view individual embedded dashboards and charts—a less-than-ideal user experience.
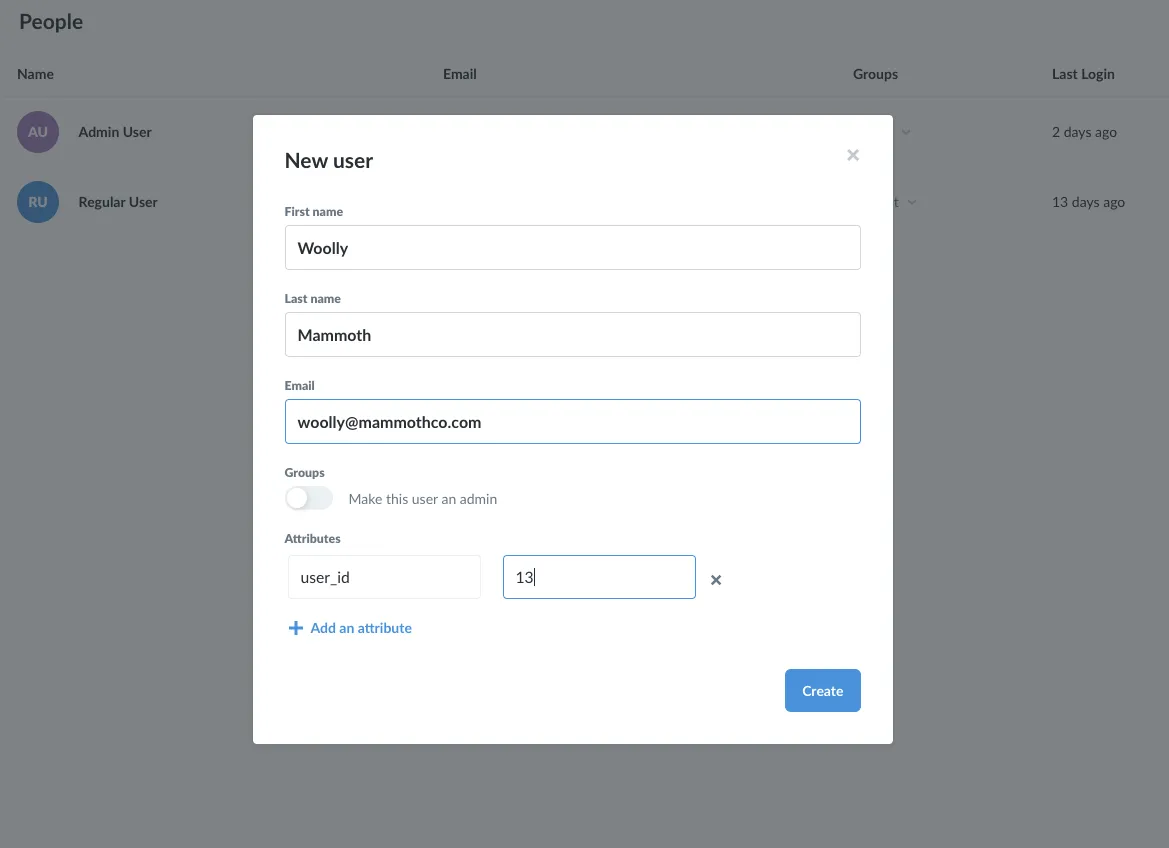
Let’s say you set up a MammothCo user in your app, megafauna-analytics.com, with name: Woolly; user_id: 13. To coordinate with your Metabase, you would then set up a user account for Woolly in your Metabase app. Next, you need to associate Woolly’s ID in your app, megafauna-analytics.com, with Woolly’s account in your Metabase. To do that, you can add an attribute to Woolly’s account in Metabase to indicate that Woolly’s user_id in your app is 13.
With SSO set up, when Woolly logs into megafauna-analytics.com, he can navigate to pages with embedded Metabase will know who he is, and what permissions he should have.
Check out our docs on SSO:
Permissions management
Now that your SSO is providing Metabase with details about who is using your app, Metabase can use those attributes to filter what each person sees, down to the columns and rows of specific tables.
How you manage permissions depends on how you store your customer data:
- Commingled (one database for all customers): you can use data sandboxing or impersonation, plus other controls.
- Segregated (one database per customer): you can use database routing (in addition to data sandboxing, impersonation, and all the other access control tools Metabase ships with.)
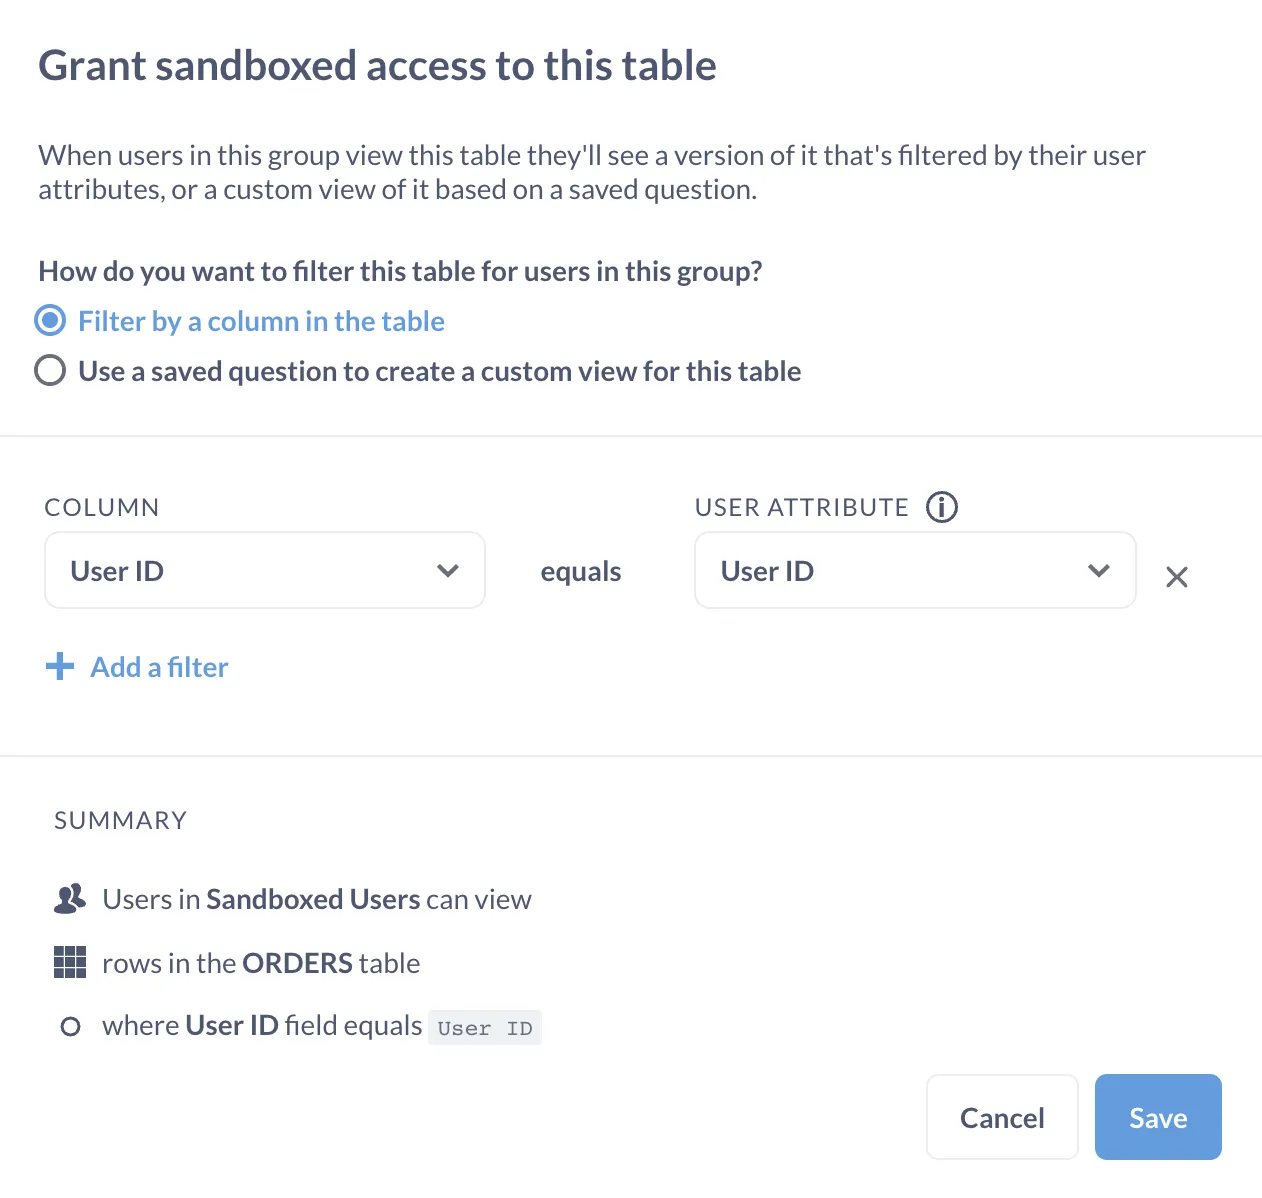
Data sandboxing
Data sandboxing works by filtering all queries based on a user attribute.
For example, if your orders table contains all customer orders, you could filter that table based on a column, say user_id. You can assign an attribute, user_id, to your users in Metabase (and attach that attribute to their login tokens), so that when users log in and view orders, they’ll only see data with rows that match their user_id.
See our docs on data sandboxing.
Impersonation
Impersonation lets you “outsource” permissions to roles in your database. Use impersonation when you’d prefer to manage permissions via roles in your database, which is particularly useful for granting people SQL access to tables. See the docs on impersonation.
Database routing
Database routing is for one-database-per-customer setups. Database routing lets you build a single dashboard against a primary database (a kind of template database), but have the dashboard swap out which database it queries depending on who is logged in. See database routing.
Was this helpful?
Next: Securing embedded Metabase
How to hide and protect sensitive data in different types of embeds.