


Embed a dashboard
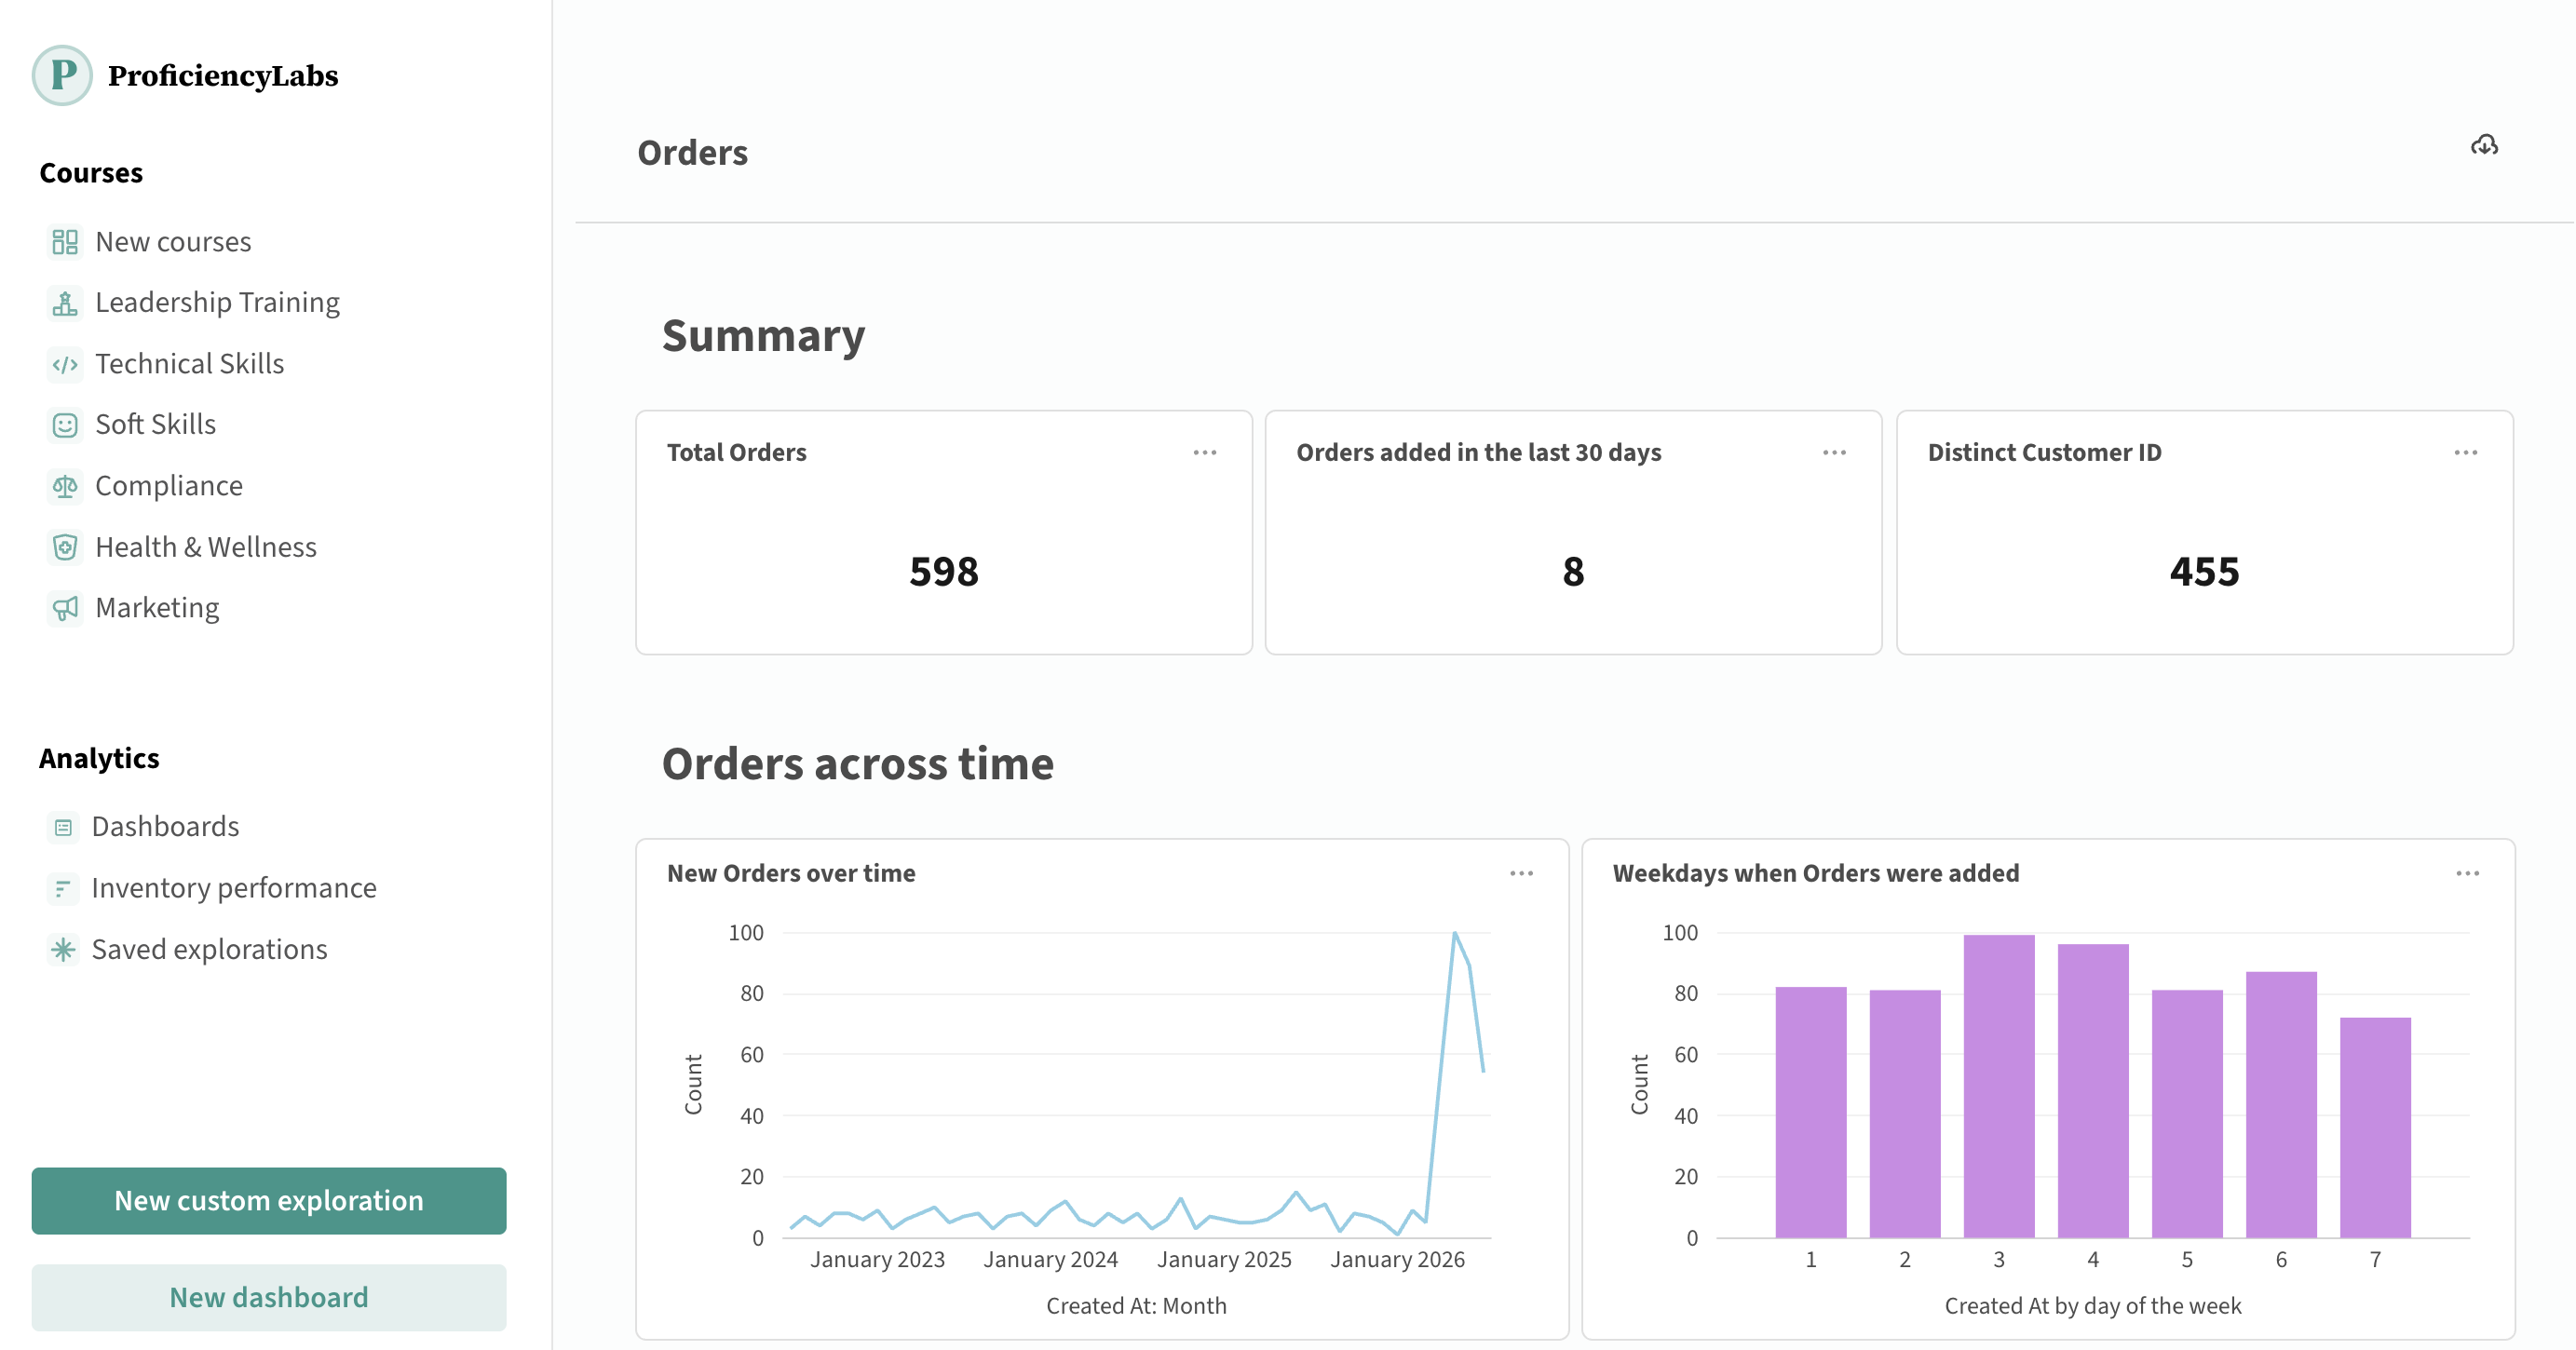
Embedded dashboard from our SDK demo site, Shoppy
There are three ways you can embed a dashboard:
- View-only dashboard: people see the results, filter them, and that’s it.
- Interactive dashboard: people can drill through the charts on the dashboard and explore the data behind them.
- Editable dashboard: people also can add cards, rearrange the layout, and save the changes.
Embed a view-only dashboard
A view-only (a.k.a. “static”) dashboard displays results without letting people explore the data. Nobody can drill through the charts or change the questions behind them. You can, however, add editable filters that people can change to update the results, as well as locked filters you can use to filter results based on who is logged in to your app.
View-only isn’t tied to one kind of embed:
- Guest embeds: always view-only. Nobody logs in to a guest embed, so Metabase has no account to check permissions against.
- SSO embeds: interactive by default. To make one view-only, turn off drill-through with
drills="false"(web component), or useStaticDashboardinstead ofInteractiveDashboard(SDK).
For view-only items, you’ll almost always want to go with guest authentication (so you don’t have to pay for each person viewing the item). If, however, you also want people to be able to self-serve data (in addition to displaying view-only items), go with SSO. Check out SSO or guest embeds.
Web component view-only dashboard
You can use the in-app wizard to set up a view-only dashboard using web components. These steps walk through a guest embed.
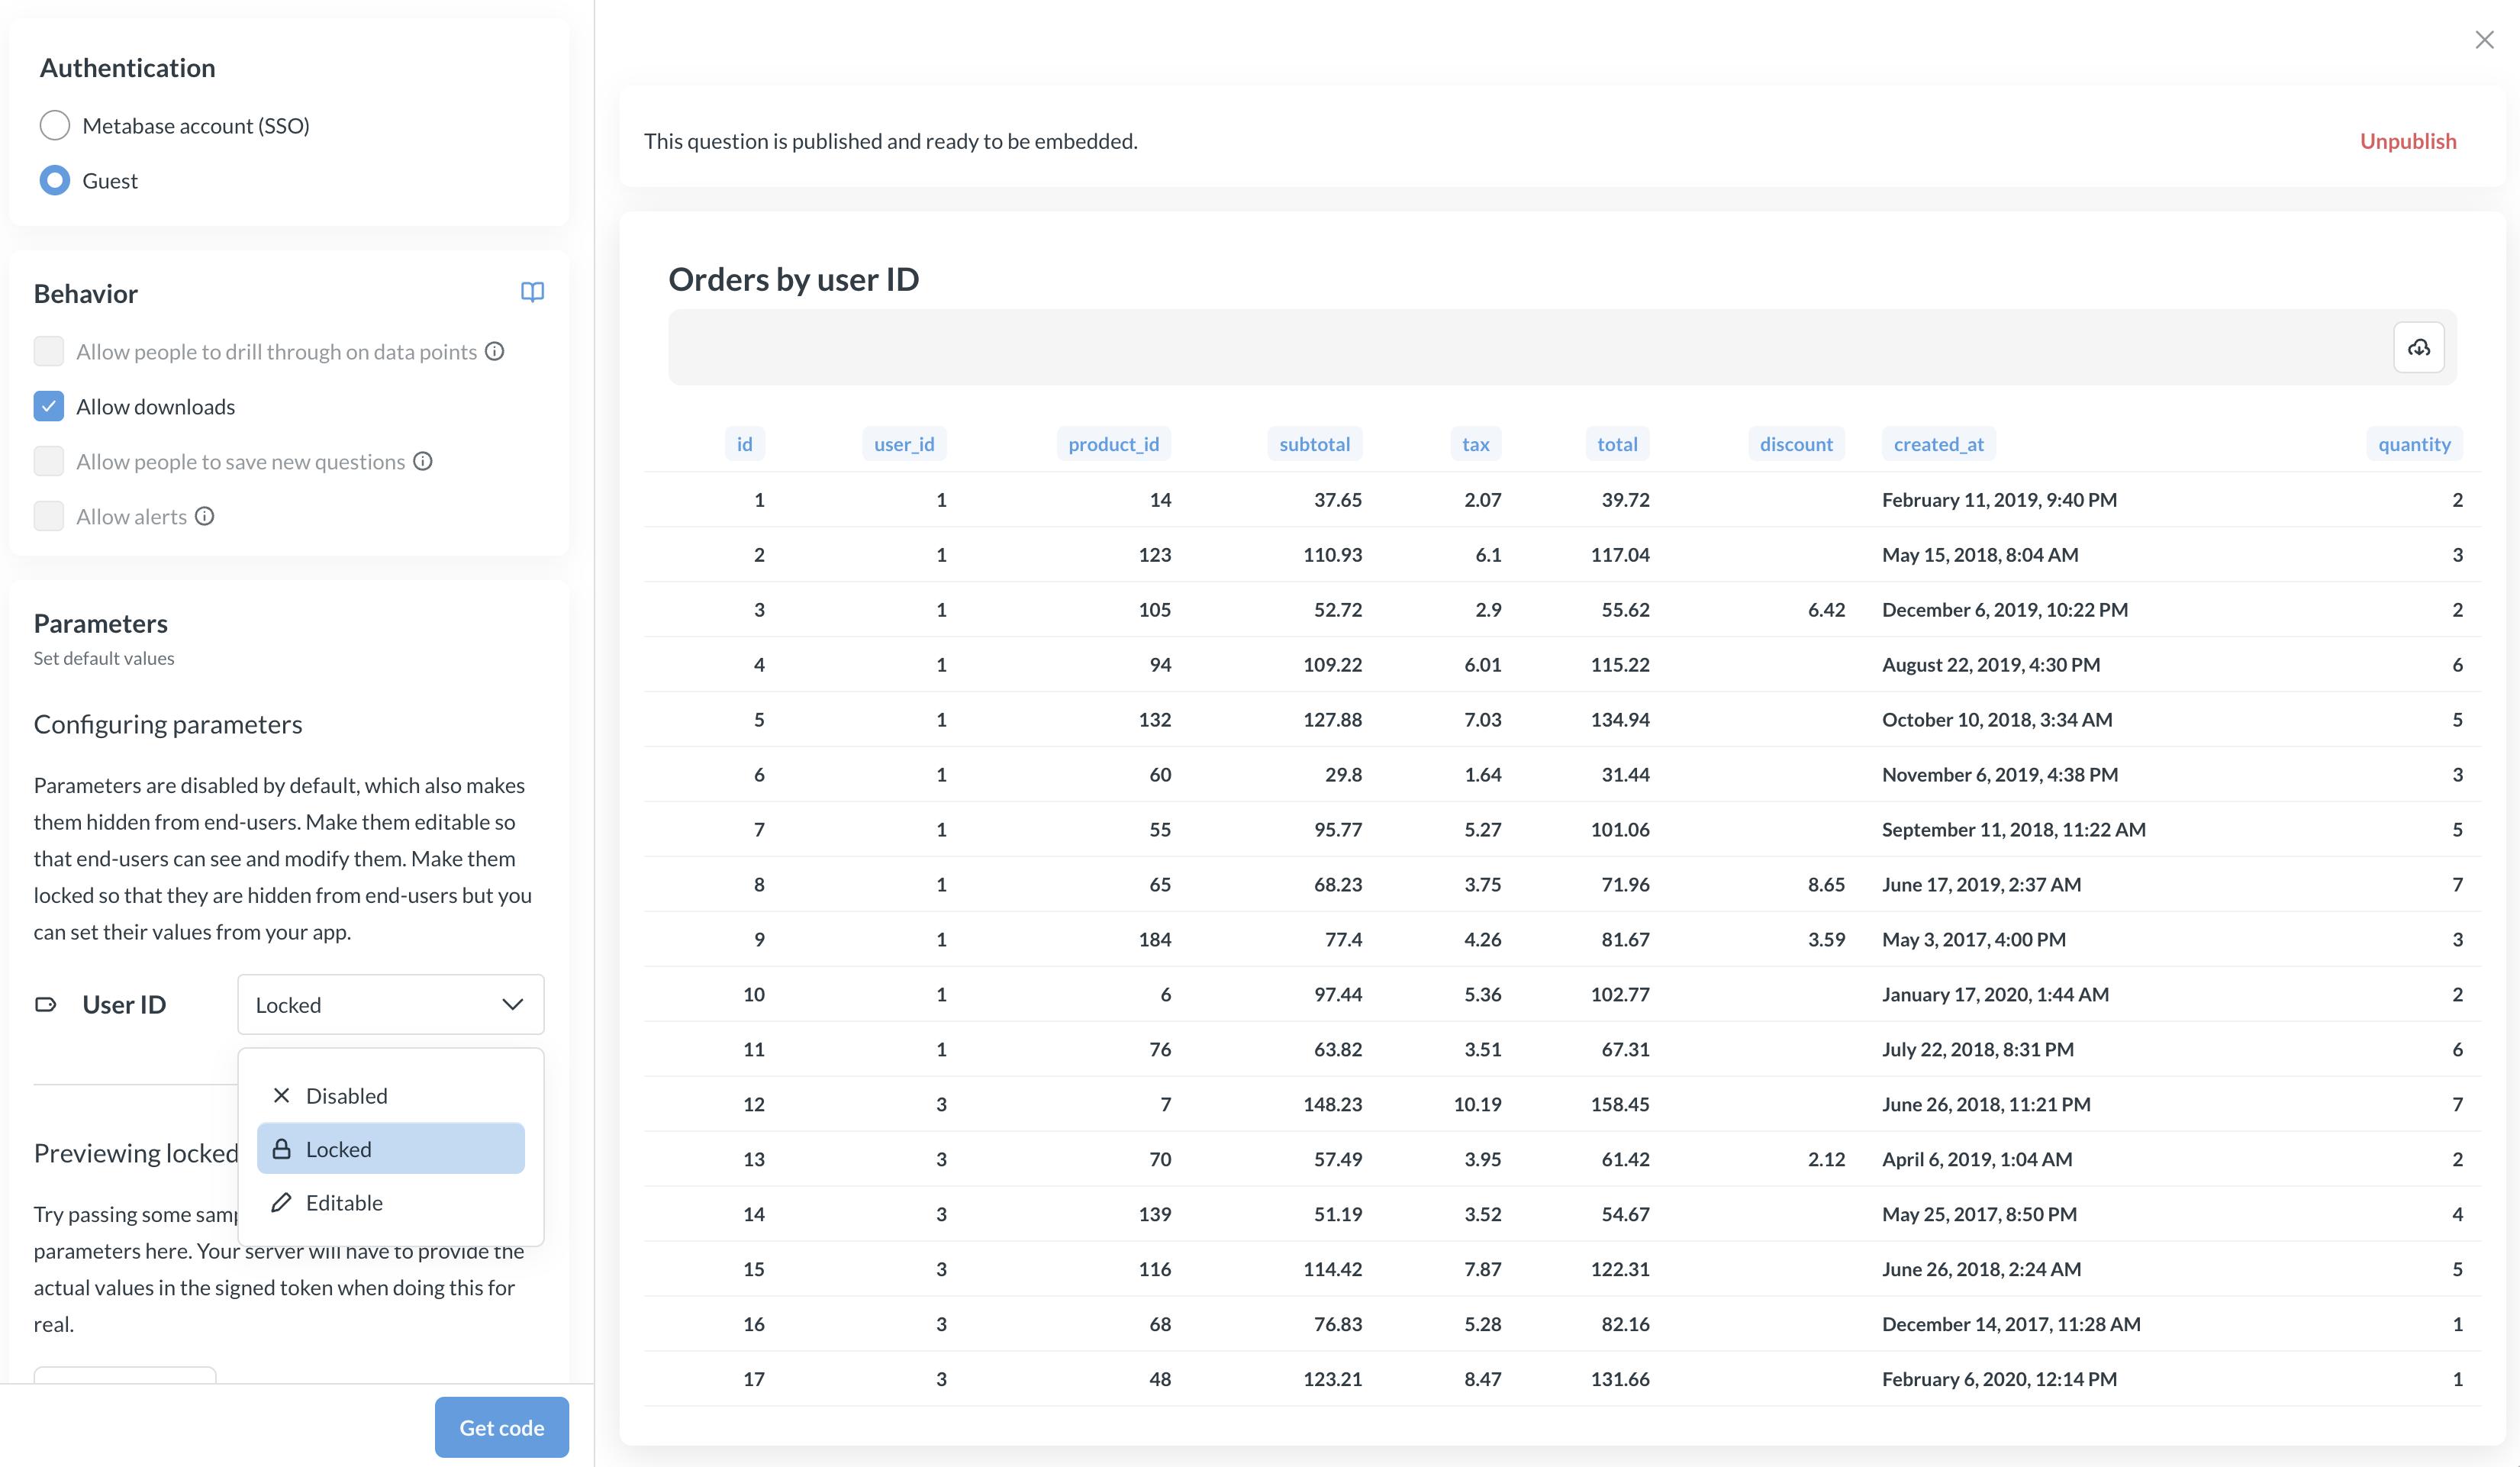
Three things need to happen: you publish the dashboard embed in Metabase, you paste the dashboard code into your app (both frontend and backend), and your server signs a JWT. The in-app wizard writes most of the code for you.
- Visit the dashboard in your Metabase.
- Click the Share icon in the upper right.
- Select Embed to open the embedding wizard.
- For authentication, choose Guest, so your app won’t need to log anyone in to your Metabase. An admin needs to turn on guest embedding first.
- Click the Publish button (publishing only applies to embeds with guest authentication).
- Under Behavior, Metabase gives you several options for customizing how the embed works. See web component attributes for what each attribute does. With guest embeds, you can only control whether people can download the data. If you’d picked SSO in step 4, this is where you’d make the embed view-only by turning off drill-through.
- If your dashboard has filters, set each filter to Editable or Locked, or leave it as Disabled. Filters are disabled by default, which hides the filter and blocks both sides from setting it: your server can’t pass a value for it in the JWT, and the person viewing can’t change it in the UI. See Parameters differ between guest and SSO embeds.
- Customize the appearance.
- Click the Get code button. You’ll get both the frontend and backend code based on the selections you made in the wizard.
- Copy the client code and paste it in your app.
- Replace the JWT the wizard pasted into your HTML. That token is a fixed string with an expiration baked into it, so an embed that ships with it will stop working.
You have two ways to hand the component a token that won’t go stale:
- Sign a token per page load. Your server signs a fresh JWT for each request and renders it into the
tokenattribute. See Server-side code for the signing code. - Let the embed fetch its own. Leave the
tokenattribute off, and pointguestEmbedProviderUriat an endpoint in your app. The embed calls that endpoint for its first token on load, and again whenever the current token expires, so the embed keeps working past that expiration.
The example below takes the second route.
Web component view-only dashboard example
Say you have a sales dashboard with a Customer filter, and you want to put it on each customer’s account page in your app, showing only that customer’s numbers.
Set the Customer filter to Locked in the dashboard’s embed settings. Locked means your server picks the filter’s value and puts it in the signed token, so the value never reaches the browser: the person on the page can’t see it, and they can’t change it. An embed on customer 13’s account page returns customer 13’s rows and nothing else. It has to work this way, because a guest embed doesn’t sign anyone in to your Metabase—only your app knows whose account page this is.
Here’s the frontend code:
<!-- embed.js defines the <metabase-dashboard> element -->
<script defer src="https://your-metabase.example.com/app/embed.js"></script>
<script>
  function defineMetabaseConfig(config) {
    window.metabaseConfig = config;
  }
</script>

<script>
  // Page-level config, shared by every Metabase component on the page
  defineMetabaseConfig({
    instanceUrl: "https://your-metabase.example.com",
    isGuest: true,
    // Your app's token endpoint. The embed calls it for its first token on
    // load, and again whenever the current token expires.
    guestEmbedProviderUri: "/api/metabase-guest-token",
    theme: {
      colors: {
        brand: "#509EE3",
        "text-primary": "hsla(204, 66%, 8%, 0.84)",
      },
    },
  });
</script>

<!-- No token in the HTML. The embed gets one from your endpoint. -->
<metabase-dashboard
  dashboard-id="1"
  with-title="true"
  with-downloads="true"
></metabase-dashboard>
The theme key sets the dashboard’s appearance. For the full theme object with all the options, check out Appearance.
And here’s the endpoint that signs the token. The embed posts the dashboard’s ID to it, along with your app’s session cookie, so your server knows both which dashboard to sign for and who’s asking:
const jwt = require("jsonwebtoken");

// Your embedding secret key. Keep it on your server; it never reaches the browser.
const METABASE_SECRET_KEY = process.env.METABASE_SECRET_KEY;

app.post("/api/metabase-guest-token", (req, res) => {
  // Work out the customer from your app's own session, not from the request
  // body---the page never says whose account page it's on.
  const customerId = req.session?.customerId;

  if (!customerId) {
    return res.status(403).json({ error: "Not signed in" });
  }

  const { entityType, entityId } = req.body;

  // Authorize the request. The browser picks the entityType and entityId, so
  // check them against your own rule before signing for them.
  // This is just an example:
  if (!customerCanView(customerId, entityType, entityId)) {
    return res.status(403).json({ error: "Not allowed" });
  }

  const payload = {
    resource: { [entityType]: entityId },
    params: {
      // Key each param by the filter's slug. Here, the locked Customer filter.
      customer: [customerId],
    },
    exp: Math.round(Date.now() / 1000) + 10 * 60, // 10 minutes
  };

  res.json({ jwt: jwt.sign(payload, METABASE_SECRET_KEY) });
});
Your endpoint has to return an object with a single jwt field. Return anything else and the embed shows an error instead of the dashboard.
Remember to check permissions! With guest authentication, your endpoint is the only thing deciding who gets a token for which dashboard. An endpoint that signs whatever entityId it’s handed will give anyone signed in to your app a token for any published dashboard.
For more on signing, check out Locked parameters and the example token endpoint. To get the signing code from the in-app wizard, set the Customer filter to Locked. To see the whole thing running, check out our sample apps.
For all modular embeds, you can also set a locale in your page-level configuration. Metabase translates its own UI automatically; to translate content strings like dashboard names and filter labels, upload a translation dictionary.
For the full list of attributes, see web component attributes.
React SDK view-only dashboard
Modular embedding SDK is only available on Pro and Enterprise plans (both self-hosted and on Metabase Cloud).
To embed a view-only dashboard with the SDK, use the StaticDashboard component. Wrap the component in the MetabaseProvider component with your auth config.
The React SDK doesn’t support more than one dashboard component on the same page yet. That applies to
StaticDashboard,InteractiveDashboard, andEditableDashboardalike, so a page can hold one of them, not two.
import React from "react";
import {
  MetabaseProvider,
  StaticDashboard,
  defineMetabaseAuthConfig,
} from "@metabase/embedding-sdk-react";

const authConfig = defineMetabaseAuthConfig({
  metabaseInstanceUrl: "https://your-metabase.example.com",
});

export default function App() {
  const dashboardId = 1; // This is the dashboard ID you want to embed

  return (
    <MetabaseProvider authConfig={authConfig}>
      <StaticDashboard dashboardId={dashboardId} withTitle={true} />
    </MetabaseProvider>
  );
}
For the full list of props, see StaticDashboard props.
Embed an interactive dashboard
Interactive dashboards are only available on Pro and Enterprise plans (both self-hosted and on Metabase Cloud).
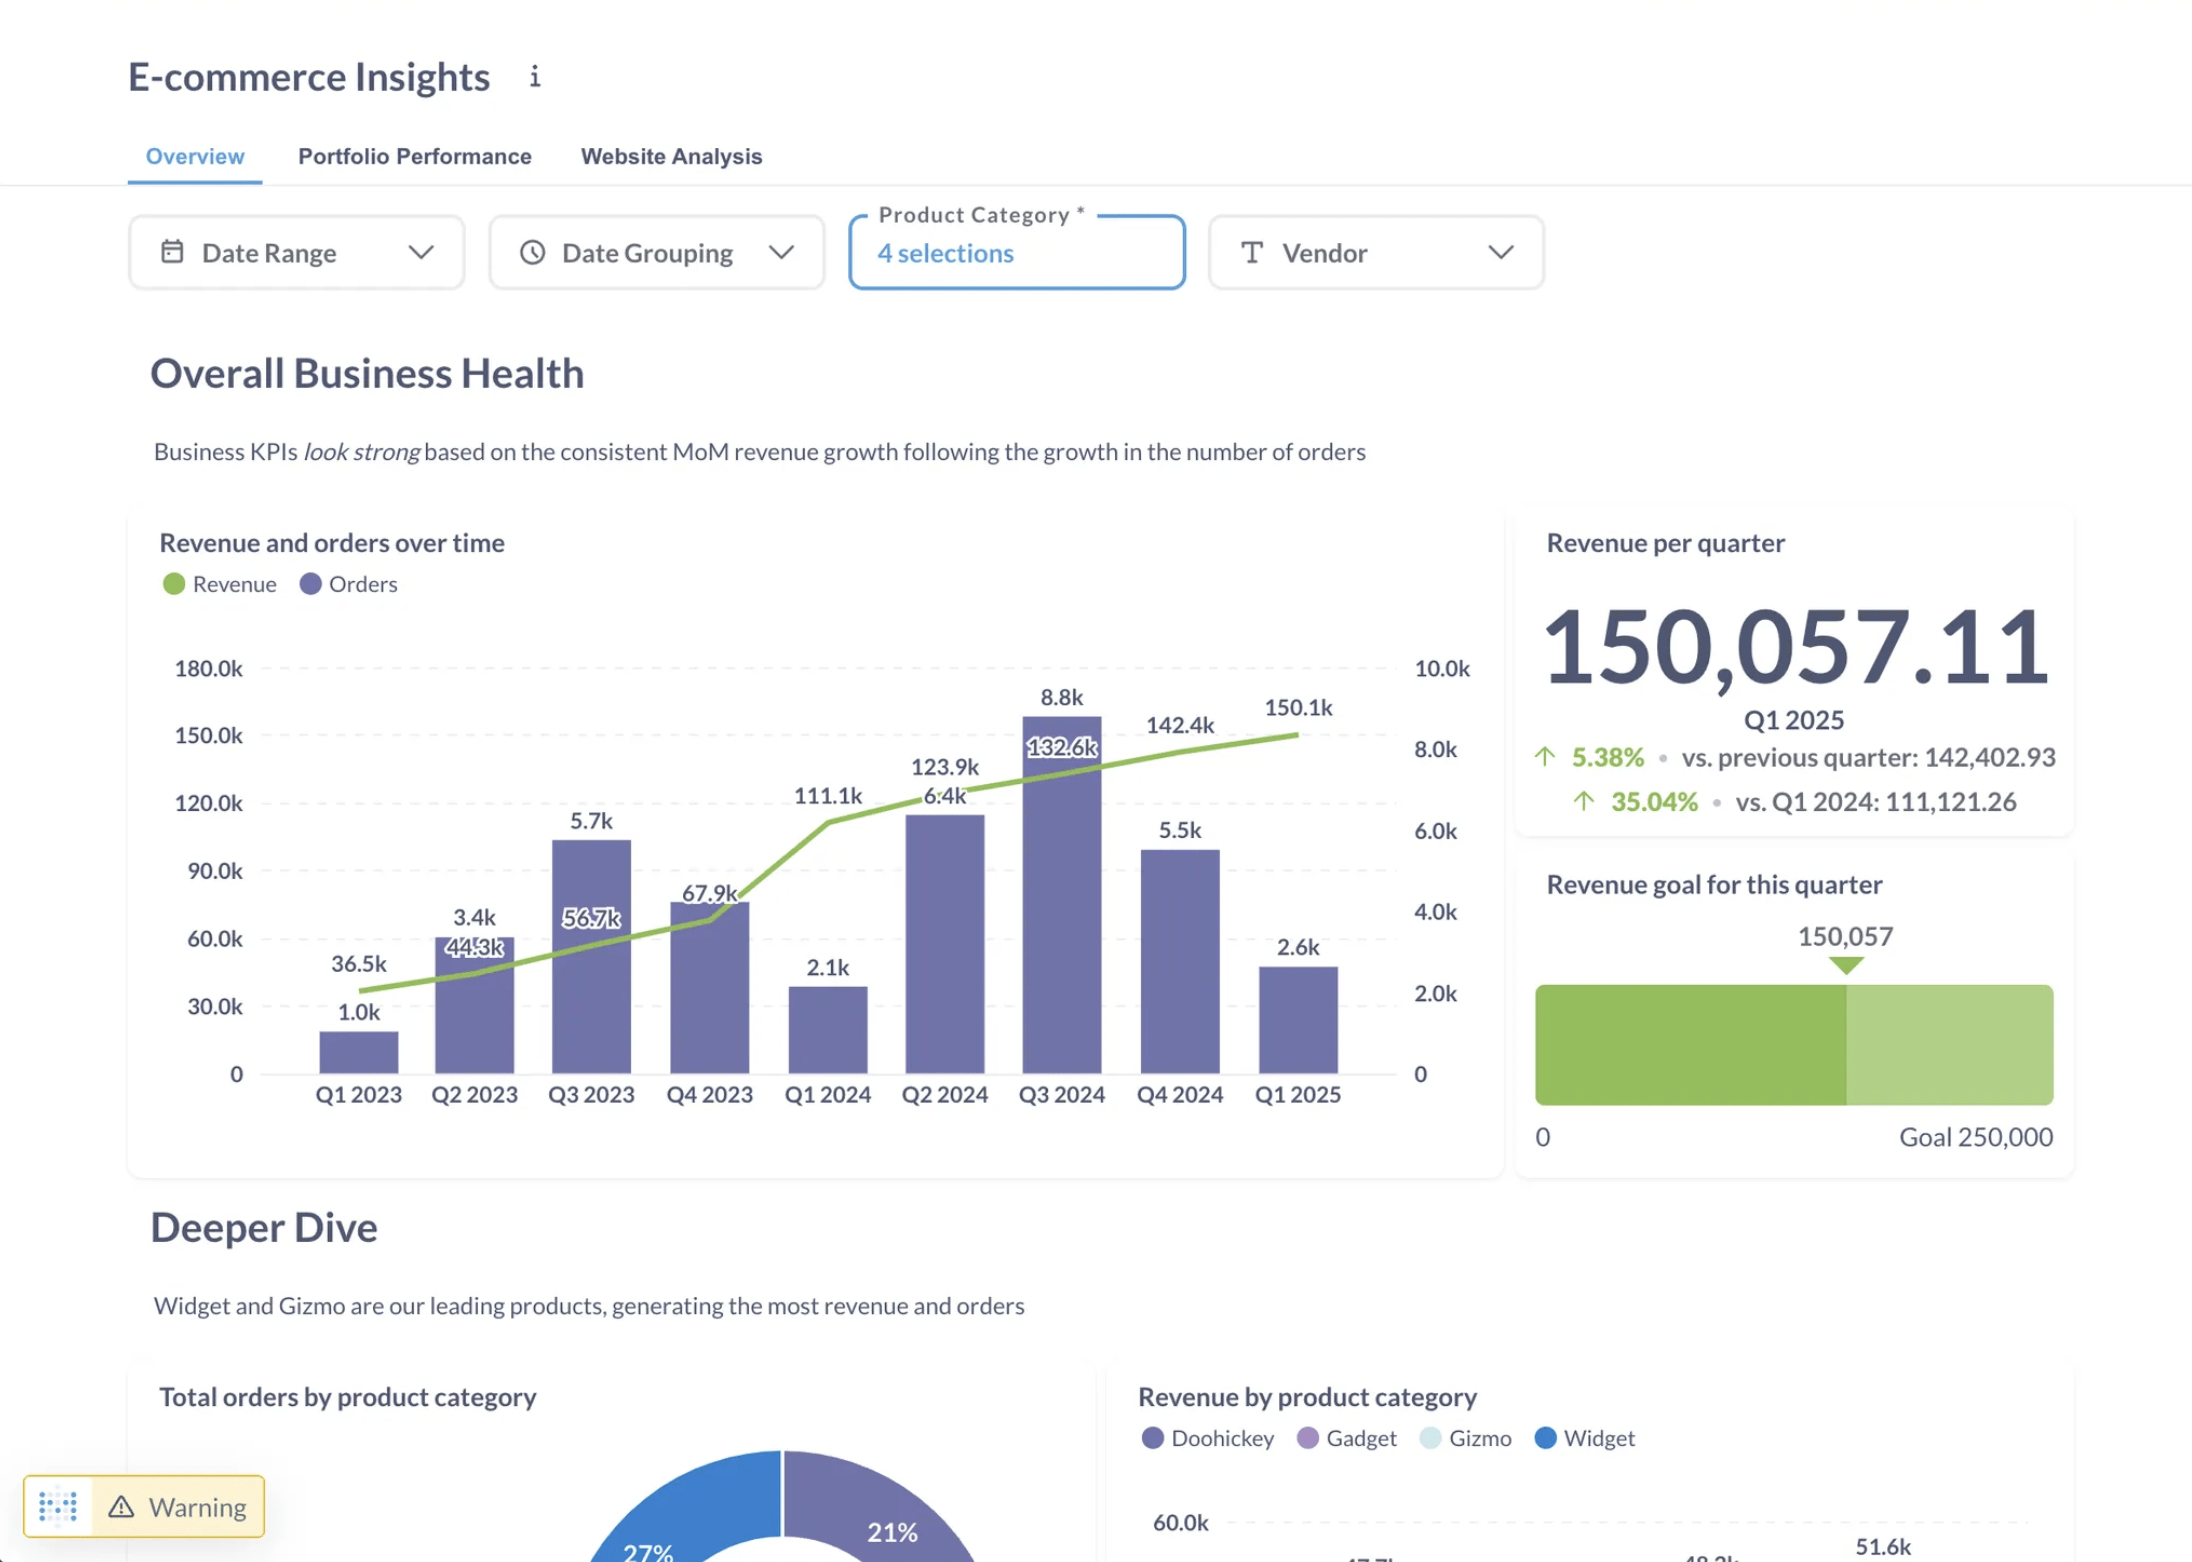
An interactive dashboard lets people explore their data: they can drill through the charts on the dashboard, filter results, and open the questions behind the cards to summarize and group them.
Interactive dashboards require SSO, which you can set up with either web components or the React SDK.
Web component interactive dashboard
Reference an existing dashboard by ID. Drill-through is on by default:
<metabase-dashboard dashboard-id="1"></metabase-dashboard>
dashboard-id takes the dashboard’s sequential ID — the number in the dashboard’s URL. On Pro and Enterprise plans, you can use the dashboard’s entity ID instead; entity IDs stay the same when you serialize content from one Metabase to another, like from staging to production.
To control what people can do with the dashboard, check out web component attributes.
Let people follow links to other dashboards and questions
By default, clicking a link to another dashboard or question does nothing, so people stay on the one thing you embedded. To let them navigate to linked content inside an SSO embed, turn on enable-entity-navigation:
<metabase-dashboard
  dashboard-id="1"
  drills="true"
  enable-entity-navigation="true"
></metabase-dashboard>
Entity navigation needs drills set to true, because drills="false" renders a view-only dashboard instead of an interactive one, and a view-only dashboard has nowhere to navigate to.
In the SDK, the equivalent prop is enableEntityNavigation, which is also off by default. Either way, people can still only open content they have collection permissions for.
React SDK interactive dashboard
Use InteractiveDashboard when you want people to explore their data.
import React from "react";
import {
  InteractiveDashboard,
  MetabaseProvider,
  defineMetabaseAuthConfig,
} from "@metabase/embedding-sdk-react";

const authConfig = defineMetabaseAuthConfig({
  metabaseInstanceUrl: "https://your-metabase.example.com",
});

export default function App() {
  const dashboardId = 1; // This is the dashboard ID you want to embed
  const initialParameters = {}; // Define your query parameters here

  // choose parameter names that are in your dashboard
  const hiddenParameters = ["location", "city"];

  return (
    <MetabaseProvider authConfig={authConfig}>
      <InteractiveDashboard
        dashboardId={dashboardId}
        initialParameters={initialParameters}
        withTitle={false}
        withDownloads={false}
        hiddenParameters={hiddenParameters}
      />
    </MetabaseProvider>
  );
}
For the full list of props, see InteractiveDashboard props.
Customize the drill-through question layout
Drilling through or clicking on a question card in the dashboard takes people to the question view with the default layout for interactive questions.
To customize that layout, pass a renderDrillThroughQuestion prop to InteractiveDashboard, with your custom view as the child component.
<InteractiveDashboard
  dashboardId={95}
  renderDrillThroughQuestion={QuestionView}
/>

// You can use namespaced components to build the question's layout.
const QuestionView = () => <InteractiveQuestion.Title />;
renderDrillThroughQuestion accepts a React component, which you can build out of the namespaced components inside InteractiveQuestion. See customize the layout.
Embed an editable dashboard
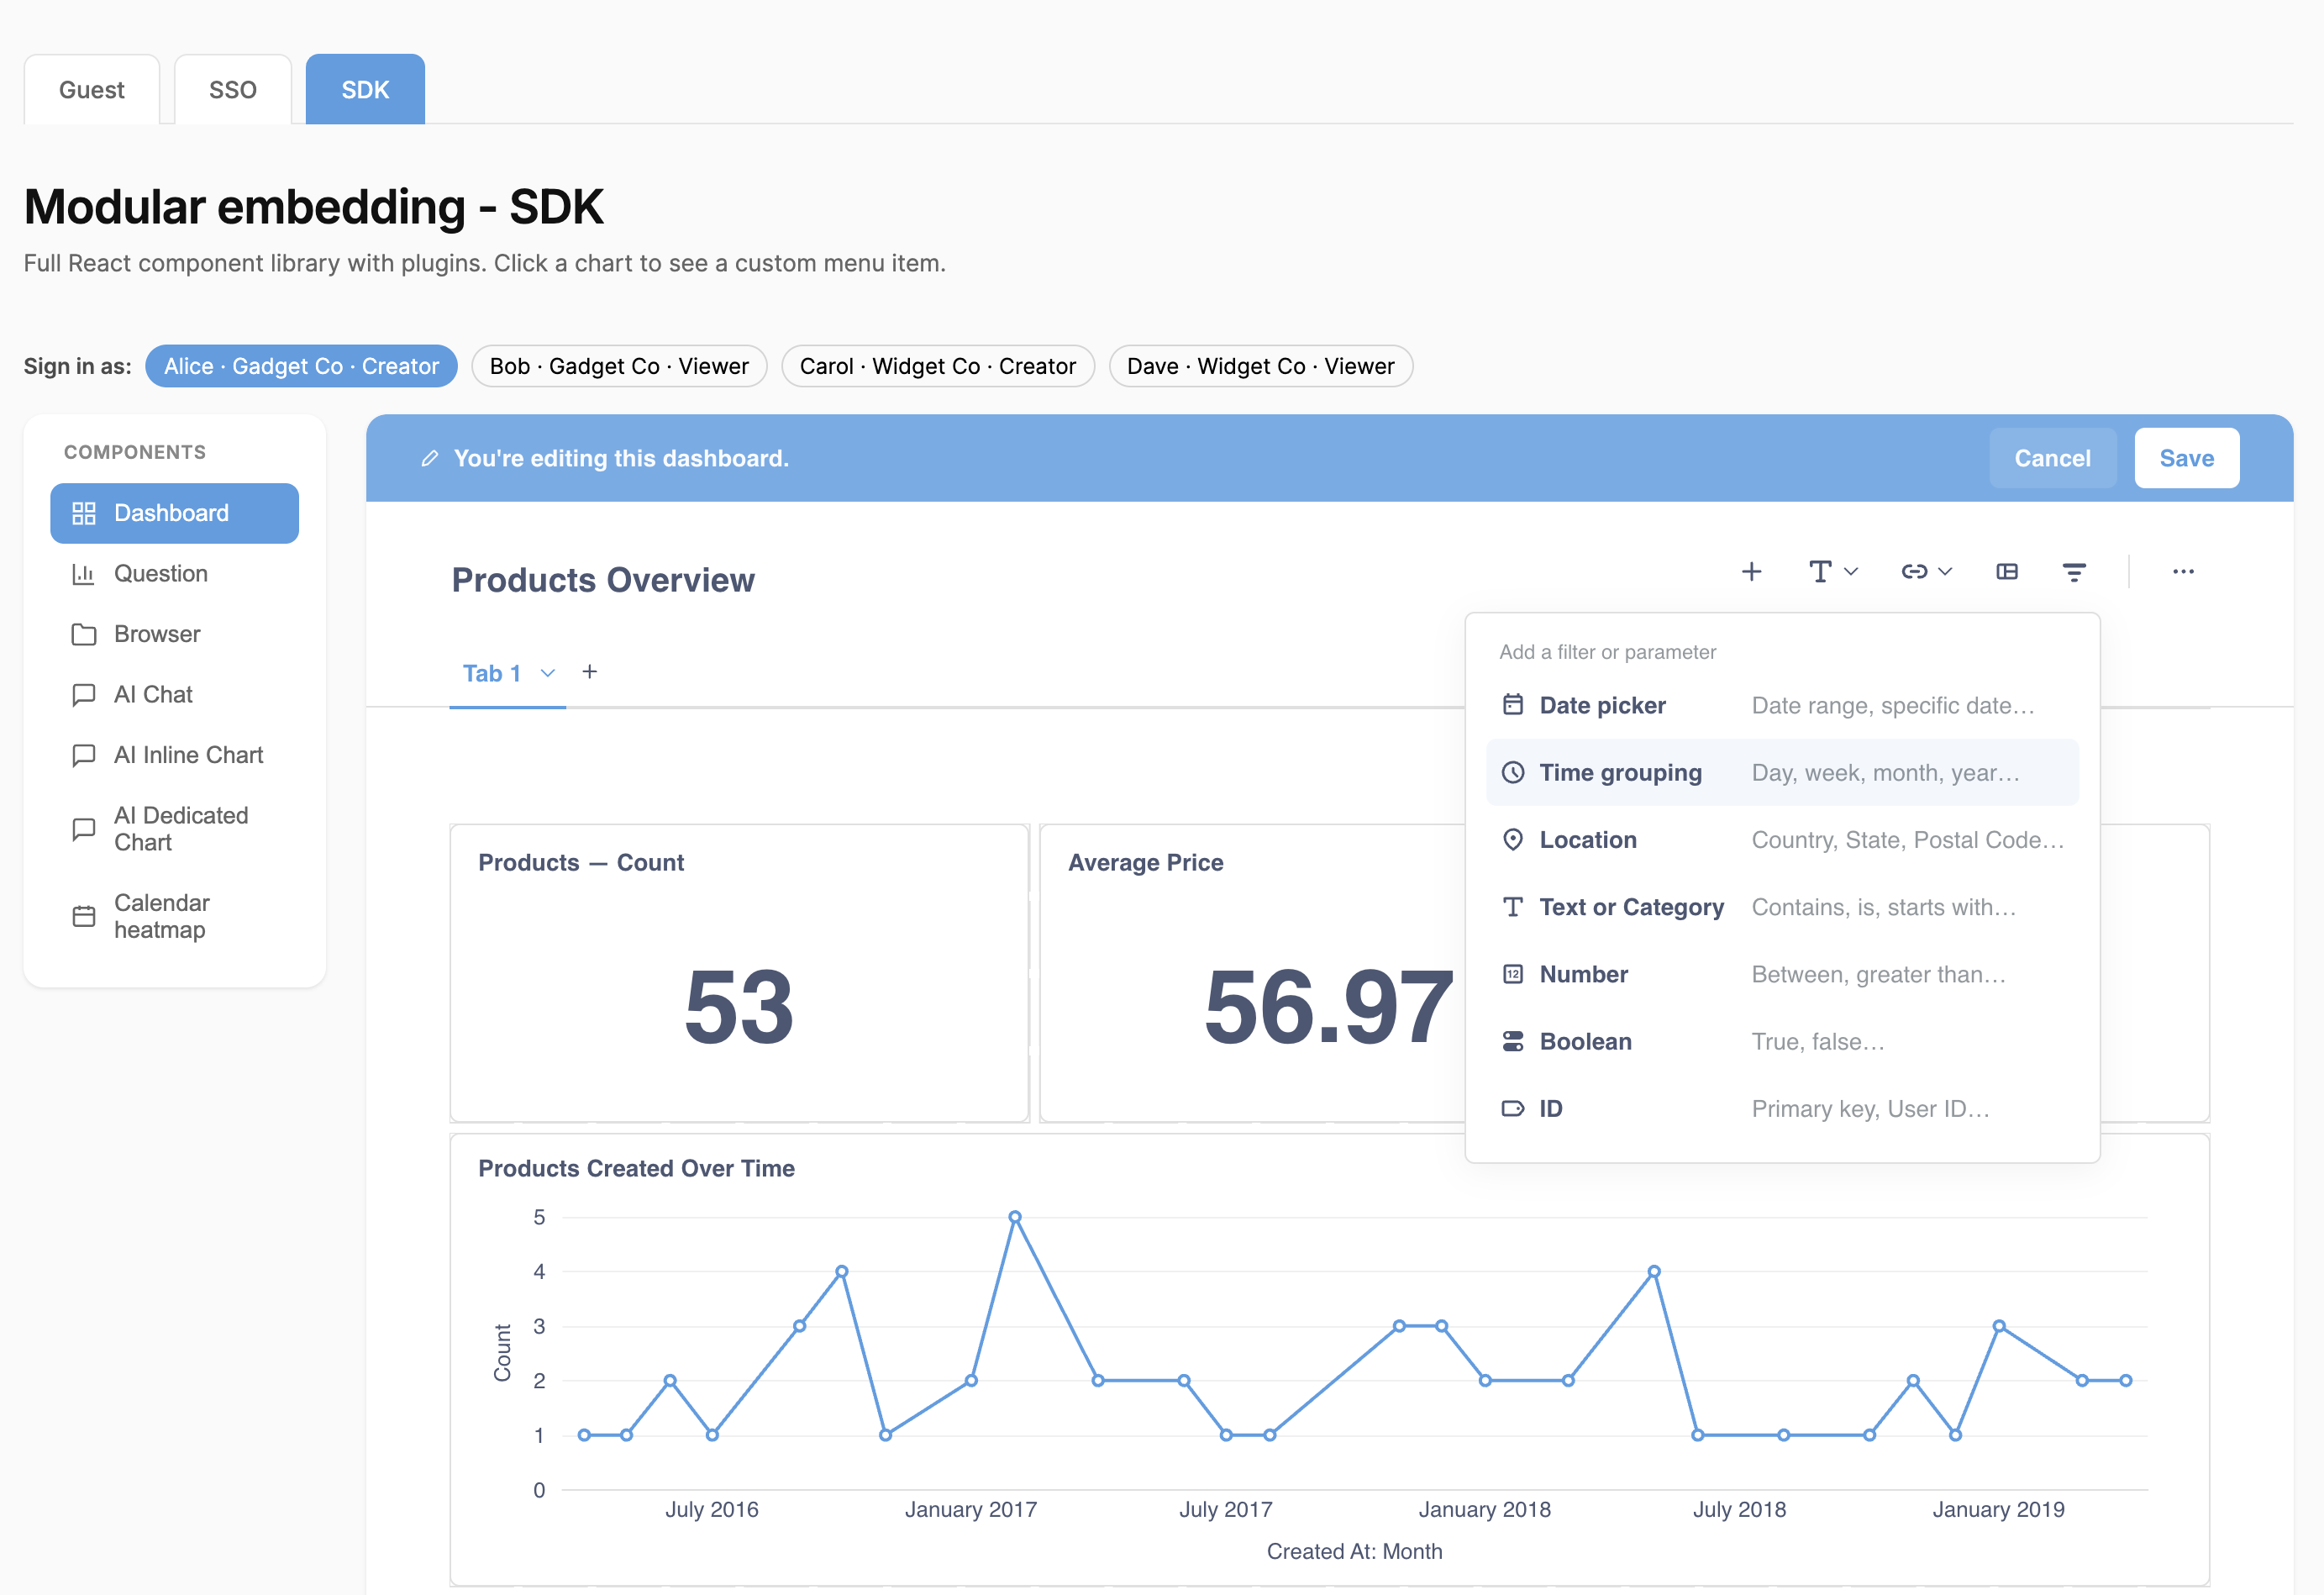
An editable dashboard does everything an interactive dashboard does, and also lets people add and update questions and other cards, and rearrange the dashboard’s layout.
Editing requires SSO.
Whoever’s editing needs curate access to the collection the dashboard lives in. Dashboards in the usage analytics collection are the exception: they’re always read-only, whatever the permissions say.
People in a tenant can only be granted View access to the shared collections you publish to every tenant, so they can never edit those dashboards. They can, however, edit dashboards in their own tenant collection.
If the dashboard renders but the edit pencil doesn’t appear, the person viewing it lacks write access to that dashboard—check the can_write field on GET /api/dashboard/:id as that person.
Web component editable dashboard
Browser component is only available on Pro and Enterprise plans (both self-hosted and on Metabase Cloud).
There’s no <metabase-dashboard> attribute that turns on editing, so there’s no built-in way to embed one editable dashboard with a web component. If you’re building in React, EditableDashboard in the SDK is the direct route.
Depending on your app, you may be able to get there with the collection browser instead. Set read-only="false", and every dashboard people open from that browser comes with the editing pencil icon:
<metabase-browser initial-collection="123" read-only="false"></metabase-browser>
The tradeoff: people have to find the dashboard by navigating the collection you point initial-collection at, since there’s no attribute that opens the browser on one specific dashboard. That works if browsing is something you wanted in your app anyway; it’s a detour if you only ever wanted to show one dashboard.
If you only want people editing one dashboard, give that dashboard a collection of its own and point initial-collection at it. People land on a one-item list and click through to an editable dashboard. The detour is one click, and there’s nowhere else to wander.
Setting read-only="false" also adds a New dashboard button, so the same embed lets people create dashboards. Check out Add new question and new dashboard buttons.
For the full list of attributes, see web component attributes.
React SDK editable dashboard
Modular embedding SDK is only available on Pro and Enterprise plans (both self-hosted and on Metabase Cloud).
EditableDashboard does everything InteractiveDashboard does, and also lets people add and update questions, content, and the dashboard’s layout. Unlike the web component, you can point it at a single dashboard, with no collection browser around it.
import React from "react";
import {
  EditableDashboard,
  MetabaseProvider,
  defineMetabaseAuthConfig,
} from "@metabase/embedding-sdk-react";

const authConfig = defineMetabaseAuthConfig({
  metabaseInstanceUrl: "https://your-metabase.example.com",
});

export default function App() {
  const dashboardId = 1; // This is the dashboard ID you want to embed

  return (
    <MetabaseProvider authConfig={authConfig}>
      <EditableDashboard dashboardId={dashboardId} />
    </MetabaseProvider>
  );
}
When someone adds a new question to a dashboard, EditableDashboard opens the query builder. Pass dataPickerProps to shape the query builder’s data picker: entityTypes narrows what people can query to "table", "question", or "model", and dataPicker switches between the simple and staged pickers. Metabase defaults to the simple picker, switching to staged at 100 or more data sources.
For example, limiting people to tables keeps them building on the data you point them at, rather than on other people’s saved questions:
import React from "react";
import { EditableDashboard } from "@metabase/embedding-sdk-react";

export default function TablesOnlyDashboard() {
  const dashboardId = 1; // This is the dashboard ID you want to embed

  return (
    <EditableDashboard
      dashboardId={dashboardId}
      dataPickerProps={{ entityTypes: ["table"] }}
    />
  );
}
"question"only works in the staged picker. In the simple picker it does nothing.
For the full list of props, see EditableDashboard props.
Let people create dashboards
Web component dashboard creation
There’s no attribute that creates a dashboard on its own. Set read-only="false" on the collection browser, and people get a New dashboard button. Metabase suggests whichever collection the person is browsing as the place to save it, and the new dashboard opens ready to edit.
React SDK dashboard creation
You can let people create new dashboards from your app with either the useCreateDashboardApi hook or the CreateDashboardModal component. Both create an empty dashboard, which you’d typically hand to EditableDashboard so people can fill it in.
useCreateDashboardApi
Use the hook when you want total control over the UI. Until the SDK is fully loaded and initialized, the hook returns null, so check for that before calling createDashboard.
const hookResult = useCreateDashboardApi();

const handleDashboardCreate = async () => {
  // hookResult is `null` until the SDK is fully loaded and initialized
  if (!hookResult) {
    return;
  }

  const dashboard = await hookResult.createDashboard(options);

  // do something with created empty dashboard, e.g., use the dashboard in EditableDashboard component
};

return <button onClick={handleDashboardCreate}>Create new dashboard</button>;
For the options you can pass, see useCreateDashboardApi options.
CreateDashboardModal
Use the component when Metabase’s own modal is good enough. It hands the new dashboard to onCreate:
const [dashboard, setDashboard] = useState<MetabaseDashboard | null>(null);

if (dashboard) {
  return <EditableDashboard dashboardId={dashboard.id} />;
}

return <CreateDashboardModal onClose={handleClose} onCreate={setDashboard} />;
For the full list of props, see CreateDashboardModal props.
Customize the menu on dashboard cards (React SDK only)
Every card on an interactive dashboard gets an overflow menu in its top right corner, with actions like downloading results and editing the question. The dashboardCardMenu plugin lets you change what’s in that menu, add your own actions, or replace the menu entirely. The plugin is React SDK only; there’s no web component equivalent.
Pass the plugin through the plugins prop, under the dashboard key, on any dashboard component. You can also set it globally on MetabaseProvider; a component’s own plugins prop wins over the global one. Here’s dashboardCardMenu with its default values:
<InteractiveDashboard
  dashboardId={1}
  plugins={{
    dashboard: {
      dashboardCardMenu: {
        withDownloads: true,
        withEditLink: true,
        customItems: [],
      },
    },
  }}
/>
For what each key does, see dashboardCardMenu plugin.
Turn off the default actions
To remove the download button from the card’s menu, set withDownloads to false. To remove the edit link, set withEditLink to false.
const plugins = {
  dashboard: {
    dashboardCardMenu: {
      withDownloads: false,
      withEditLink: false,
      customItems: [],
    },
  },
};
Add your own actions to the menu
Add custom actions by putting objects in the customItems array. Each element can be an object, or a function that receives { question } and returns an item:
type DashCardMenuItem = {
  iconName: string;
  label: string;
  onClick: () => void;
  disabled?: boolean;
};
Here’s an example:
const plugins: MetabasePluginsConfig = {
  dashboard: {
    dashboardCardMenu: {
      customItems: [
        {
          iconName: "chevronright",
          label: "Custom action",
          onClick: () => {
            alert(`Custom action clicked`);
          },
        },
        ({ question }) => {
          return {
            iconName: "chevronright",
            label: "Custom action",
            onClick: () => {
              alert(`Custom action clicked ${question?.name}`);
            },
          };
        },
      ],
    },
  },
};
Replace the menu with your own component
To swap out the whole menu, pass a function that returns a React element. The function receives { question }:
const plugins: MetabasePluginsConfig = {
  dashboard: {
    dashboardCardMenu: ({ question }) => (
      <button onClick={() => console.log(question.name)}>Click me</button>
    ),
  },
};
Customize what happens when someone clicks a card
To change the menu people get when they click a data point on a dashboard card, use the mapQuestionClickActions plugin. See Customize what happens when someone clicks on a chart.
To send people somewhere instead—another dashboard, a question, or an external URL—set up a custom destination. In guest embeds, you can only use the URL option, and external URLs open in a new tab or window. You can propagate filter values into the URL, unless the filter is locked.
Show people only their own data
Say you want to show each customer only their own numbers. How you restrict the rows depends on how you authenticate the embed.
Lock a filter on a guest embed
Embeds with Guest authentication can lock a filter. Your app sets the filter’s value in the signed token on your server, so the value comes from your app rather than from whoever’s clicking around the page. They can’t see the value, and they can’t change it. An embed on a customer’s account page returns that account’s rows, whether or not Metabase has any idea who’s looking at it.
Unlike a question, which needs a SQL variable to lock onto, any dashboard filter can be locked, including filters wired up to query builder questions. Set the filter to Locked in the dashboard’s embed settings, then pass its value in the token:
const payload = {
  resource: { dashboard: 1 },
  params: {
    category: ["Gadget"], // Locked. Set by your app, not by whoever's viewing.
  },
  exp: Math.round(Date.now() / 1000) + 10 * 60,
};

const token = jwt.sign(payload, METABASE_SECRET_KEY);
A locked filter also narrows the options in every editable filter on the same dashboard, the way linked filters do. And if the locked filter feeds a plain variable in a SQL question anywhere on the dashboard, pass one value (unless that query uses IN ({{variable}})). See Locked parameters.
Use permissions on an SSO embed
Embeds with SSO don’t need to lock filters. Since Metabase knows who’s viewing, you can apply data permissions and let Metabase filter the rows, instead of locking filters by hand.
Control dashboard filters from your app
To drive a dashboard’s filters from your app’s own code, set their values from the page. The embedding APIs call these values parameters. You can set starting values that people can still change, hold the values in your app and get a callback when they change, and hide Metabase’s widgets when your app supplies its own filter UI. Check out Embedding parameters for all of it.
Your app sets these values in the browser, and people can change them, so they don’t restrict what anyone can query. To restrict the data itself, see Show people only their own data.
Let people set up dashboard subscriptions
You can let people set up dashboard subscriptions from an embedded dashboard.
Either way, Metabase hides the subscriptions button unless all of these are true:
- Your Metabase has email set up. Slack on its own won’t do it: the button checks for email specifically.
- The embed is an authenticated (SSO) embed. Guest embeds don’t get subscriptions.
- The dashboard has at least one question card (i.e., not a text or heading card).
Whoever’s viewing also needs collection permissions for the collection that holds the dashboard, and the Subscriptions and alerts application permission to set one up. Metabase grants that permission to the All Users group by default, so admins have to set it to No to take it away.
Subscriptions sent from an embedded dashboard exclude links to Metabase items.
Web component dashboard subscriptions
Set the with-subscriptions attribute:
<metabase-dashboard
  dashboard-id="1"
  with-subscriptions="true"
></metabase-dashboard>
Drill-through also has to be on: drills="false" renders a view-only dashboard, and the web component doesn’t pass with-subscriptions through to it.
React SDK dashboard subscriptions
Pass withSubscriptions to a dashboard component:
<InteractiveDashboard dashboardId={dashboardId} withSubscriptions />
StaticDashboard takes withSubscriptions too, so you can show the button on a view-only dashboard.
Refresh a dashboard automatically
To rerun a dashboard’s cards on a timer, set a refresh interval in seconds. Each refresh re-queries your database, so pick an interval your database can keep up with.
Web component auto-refresh
Set auto-refresh-interval:
<metabase-dashboard
  dashboard-id="1"
  auto-refresh-interval="60"
></metabase-dashboard>
React SDK auto-refresh
Set autoRefreshInterval:
<InteractiveDashboard dashboardId={dashboardId} autoRefreshInterval={60} />
Customize dashboard appearance
You can customize colors, UI, and more.
Web component dashboard appearance
- Title: show or hide the dashboard title with
with-title. Defaults totrue. - Downloads: show or hide the button that downloads the dashboard as a PDF, plus the download buttons on each card’s results, with
with-downloads. Defaults tofalse, so set it totrueif you want people to be able to download results. Changing it requires a Pro or Enterprise plan.
To set the height, style the <metabase-dashboard> element with CSS. The element renders as a block, and the embed fills it:
<style>
  metabase-dashboard {
    height: 800px;
  }
</style>

<metabase-dashboard dashboard-id="1"></metabase-dashboard>
The embed won’t render shorter than 600 pixels, no matter which height you set.
React SDK dashboard appearance
- Title: show or hide the dashboard title with
withTitle. Defaults totrue. - Card titles: show or hide the title on each card with
withCardTitle. - Downloads: show or hide the button that downloads the dashboard as a PDF, plus the download buttons on each card’s results, with
withDownloads. Defaults tofalse, so set it totrueif you want people to be able to download results.
Dashboard components fill the height of their container (min-height: 100%). Override that with the style or className props:
<EditableDashboard
  style={{
    height: 800,
    minHeight: "auto",
  }}
  dashboardId={dashboardId}
/>
Theme an embedded dashboard
Set a light or dark preset, or (on Pro/Enterprise) customize colors and fonts. Web components take the theme in defineMetabaseConfig; the SDK takes it from defineMetabaseTheme on MetabaseProvider. The theme object itself is the same either way.
The dashboard component in the theme has its own overrides:
{
  components: {
    dashboard: {
      // Background color for all dashboards
      backgroundColor: "#2F3640",

      // Border color of the dashboard grid, shown only when editing dashboards
      gridBorderColor: "#EEECEC",

      card: {
        // Background color for all dashboard cards
        backgroundColor: "#2D2D30",

        // Apply a border color instead of shadow for dashboard cards
        border: "1px solid #EEECEC",
      },
    },
  },
}
Colors set in a card’s visualization settings override theme colors. See also appearance.
Remove the “Powered by Metabase” banner
On the OSS and Starter plans, Metabase adds a “Powered by Metabase” banner to guest embeds. See Removing the “Powered by Metabase” banner.
Further reading
- Dashboard component reference
- Embed a chart
- Embed the query builder
- Appearance
- Embedding parameters
- Parameters reference
- Translating embeds
- Guest embeds
- Authentication
- Modular embedding SDK
- Modular embedding components
- Embed an AI chat
Read docs for other versions of Metabase.